Manual: Retail admin & back office
Setting up products, suppliers, purchase orders, goods receipt, and the buying chain for a retail workspace.
This manual covers the back-office side of running a retail workspace: getting products into the catalog, managing who you buy from, and the full purchasing chain from order to posted stock. For the till itself, see Manual: Retail till & billing.
Everything here is ADMIN/OWNER work (a few screens are AGENT-readable too) - it's the setup a cashier never needs to touch.
Getting started: setting up your business
Before your first real sale, a handful of one-time setup screens need to be filled in. Do these in order the first time you turn on Retail POS for a new workspace - once done, nobody has to think about them again until something changes (a new tax rate, a new till, a new hire).
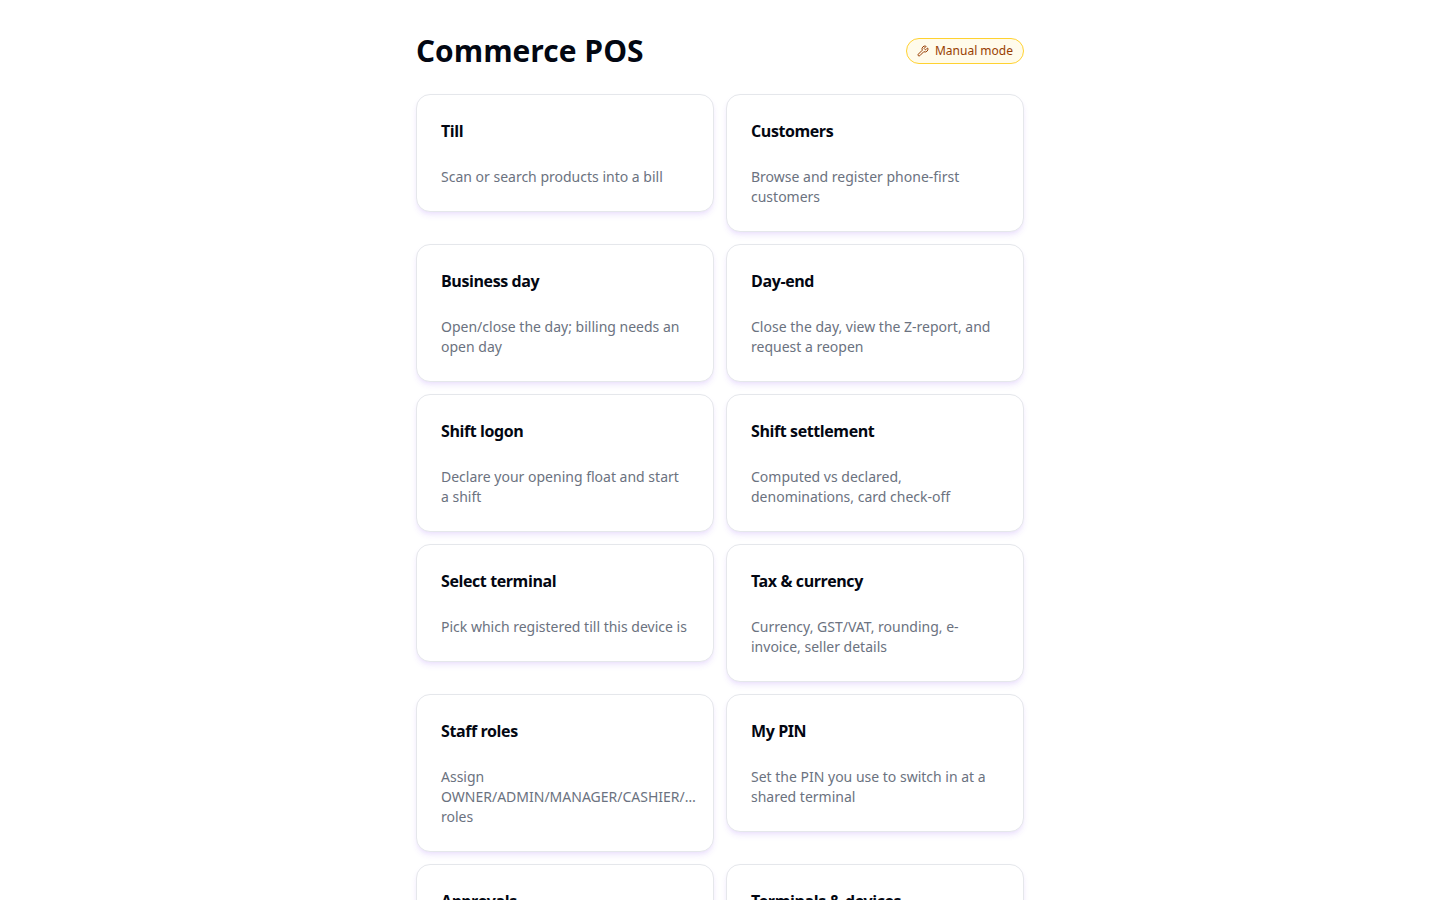
Everything you need - both one-time setup and day-to-day till work - lives in the Commerce POS app, opened from the button pinned at the top of the sidebar (or Settings → Open Commerce POS). Its hub is your map, grouped by what the work is: Selling and Shift & day at the top, Setup - the screens below - at the bottom.
1. Tax & currency
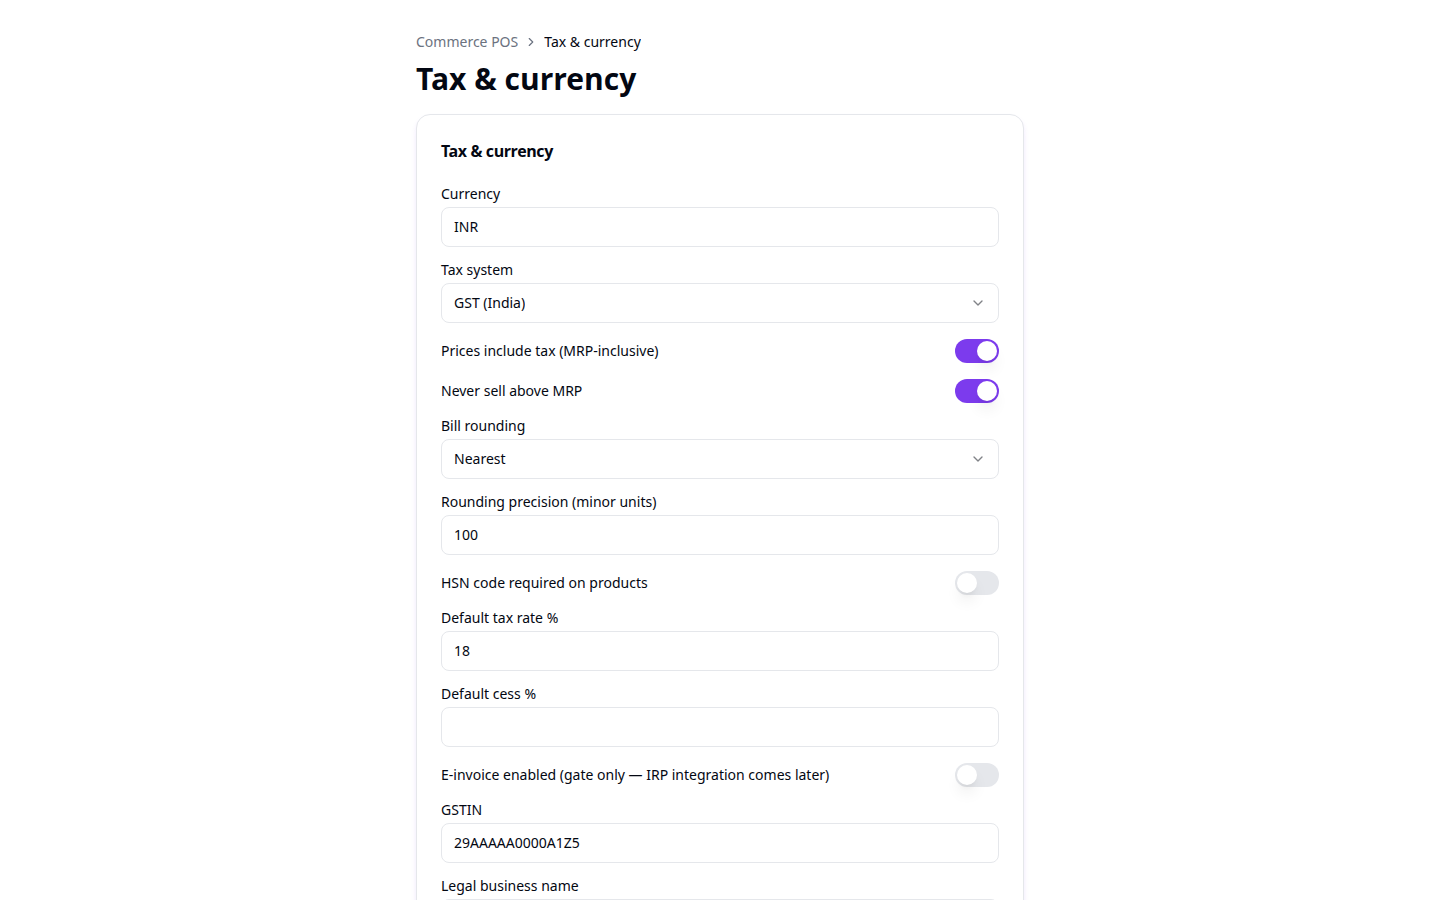
This is the single screen every price and every printed invoice reads from. Set your currency, your tax system (GST for India, VAT for Europe, or none at all), and whether the prices you type elsewhere already include tax (MRP-inclusive, the norm in India) or are tax-exclusive (the norm in Europe) - the same app runs both models, this toggle is what decides which one your workspace uses.
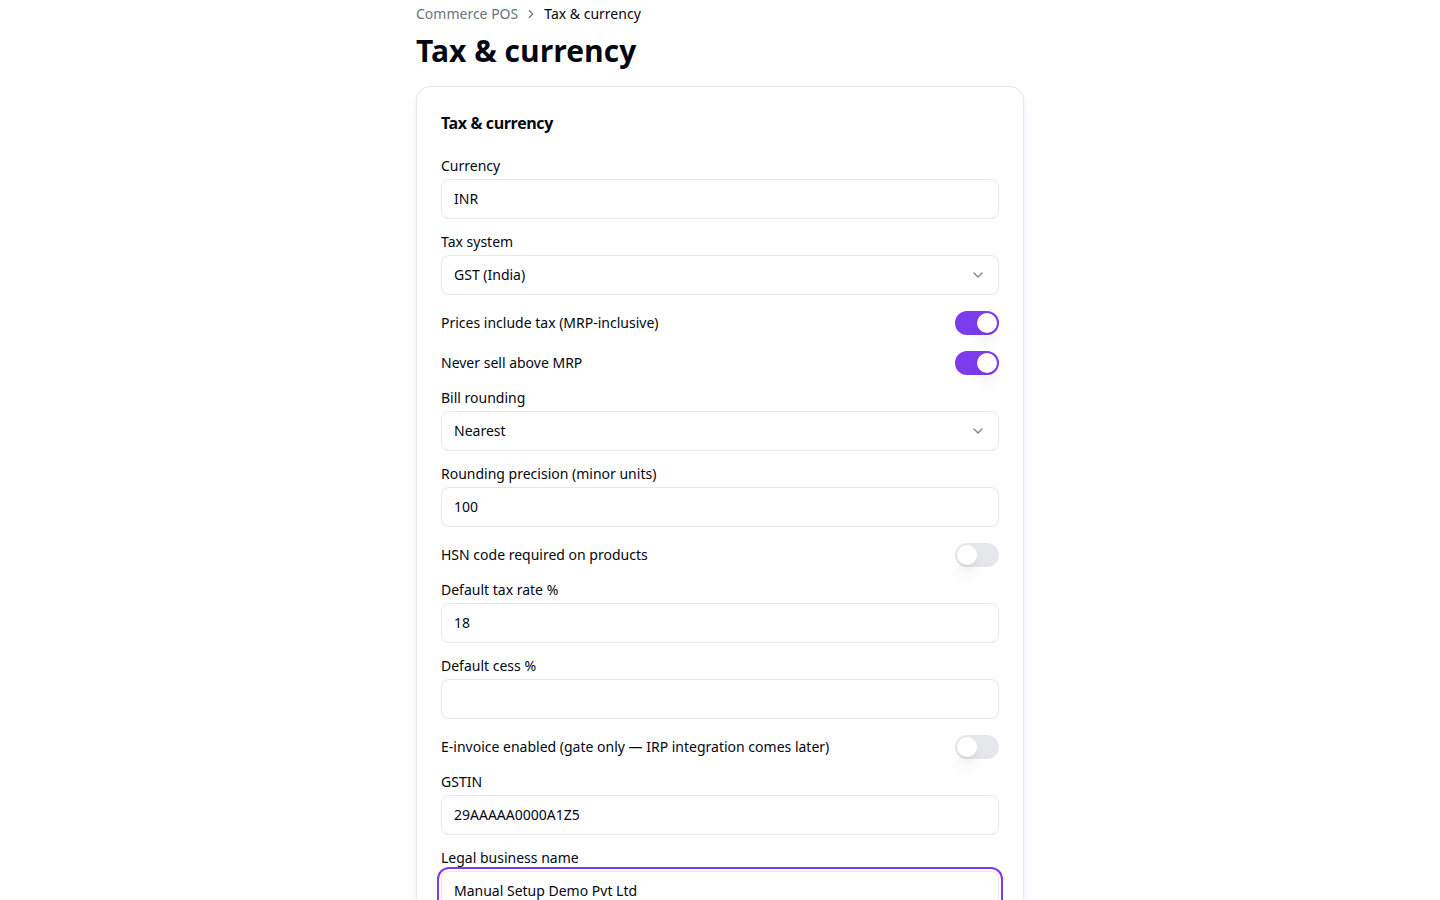
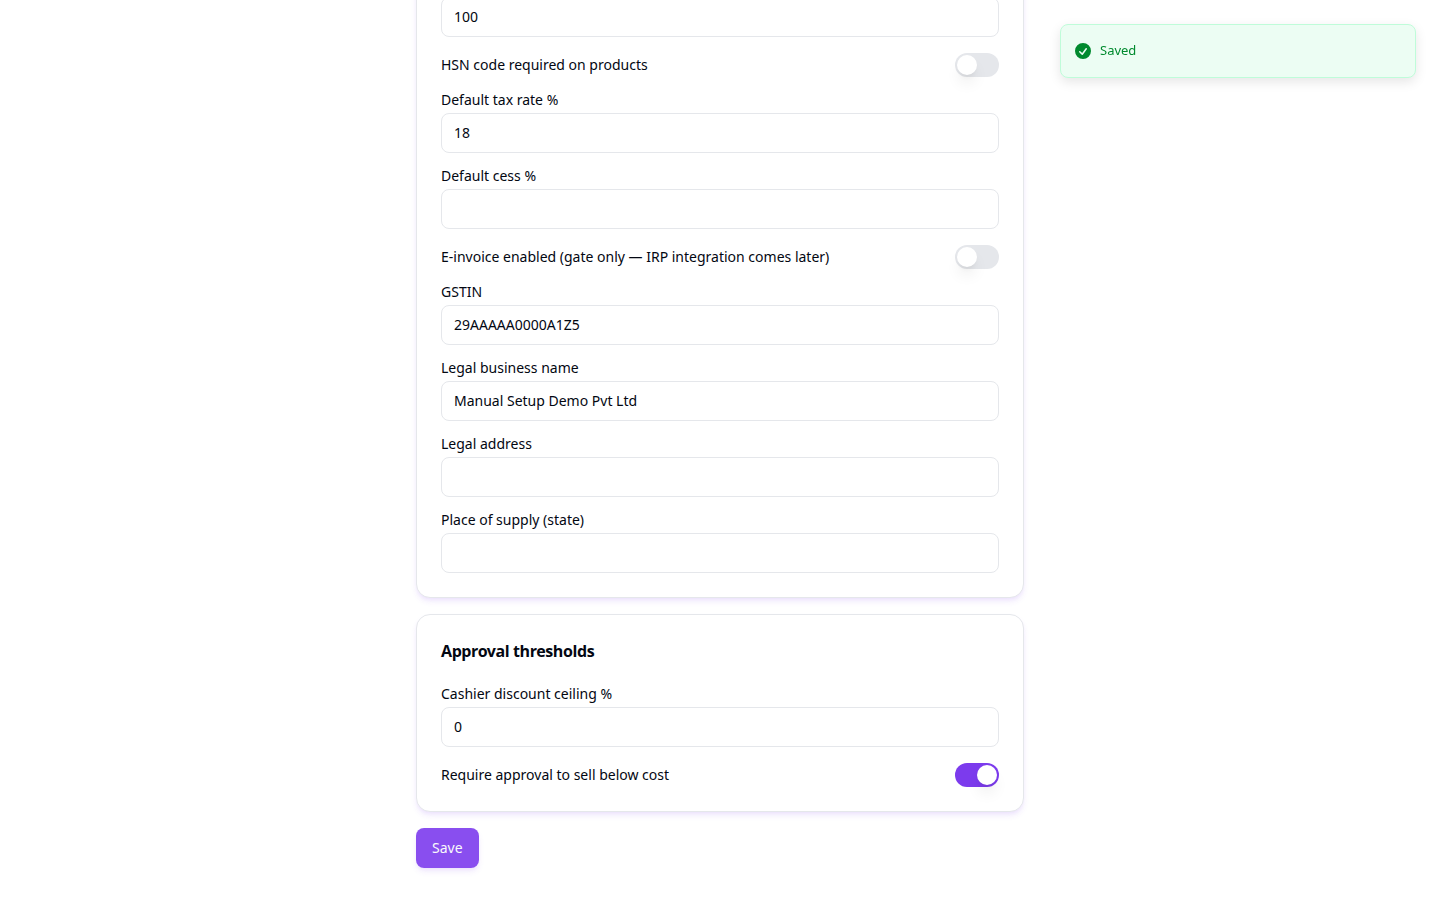
Fill in your GSTIN and legal business name if you're on GST - these print on real invoices. Bill rounding and its precision control how the final total on a bill gets rounded (to the nearest rupee, for instance). Further down, Approval thresholds set two spend-control limits: how much discount a plain cashier may give without a manager's sign-off (Cashier discount ceiling %), and whether selling below cost always needs approval.
2. Staff roles
A commerce role is separate from someone's platform role (Owner, Admin, Agent, Member) - it's what a person is allowed to do specifically at the till: Owner, Admin, Manager, Cashier, Counter, Server, Kitchen, or Storekeeper. Nobody can use the till features at all until they hold at least one of these.
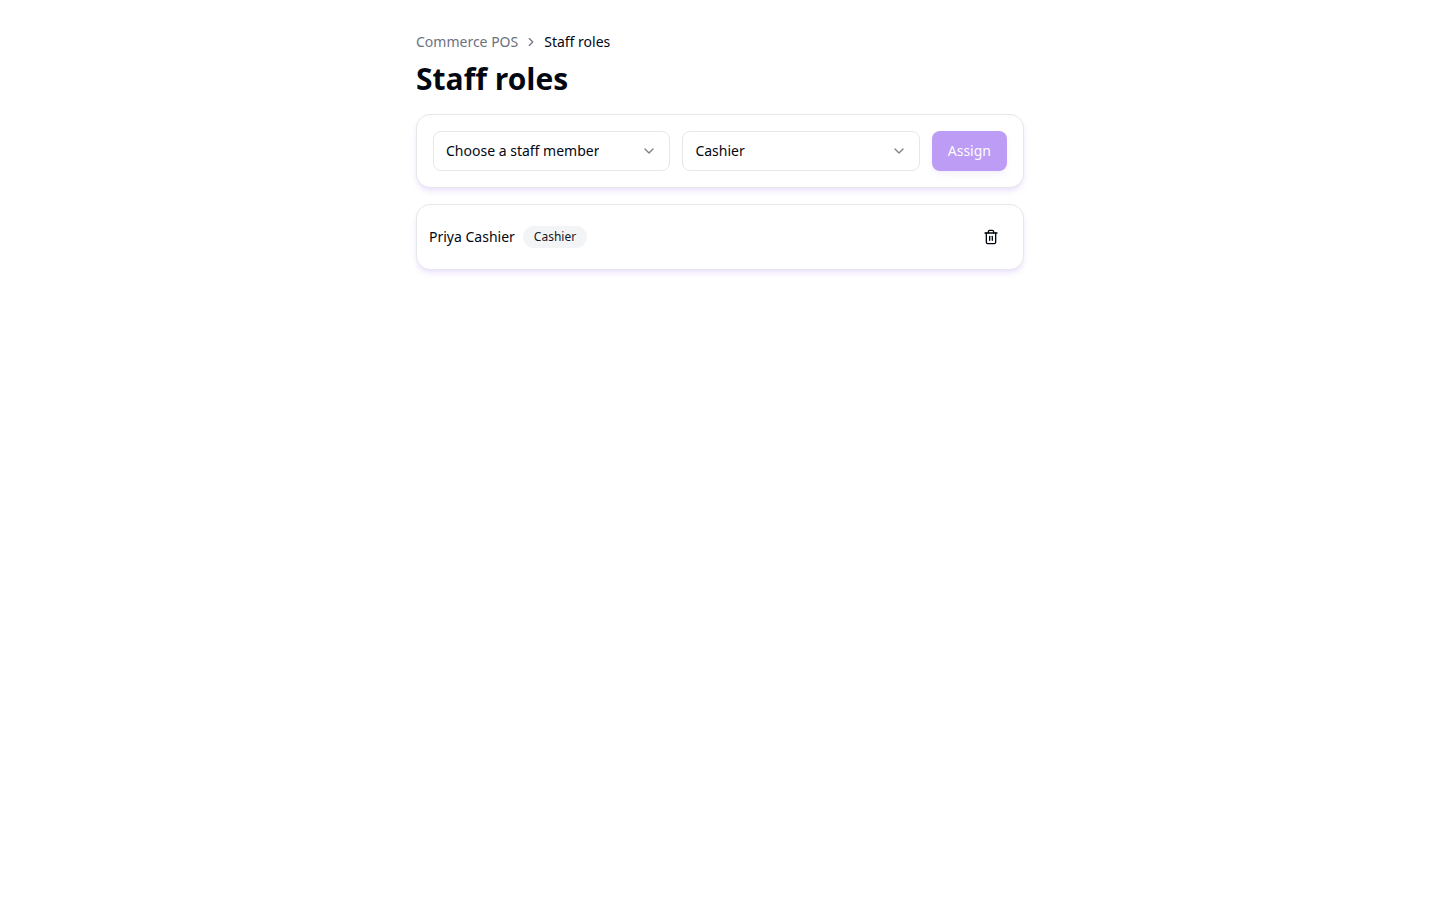
Pick a staff member and a role, then click Assign. Do this once for yourself too - you'll need a commerce role before you can set your own PIN (next step) or clock in at a till.
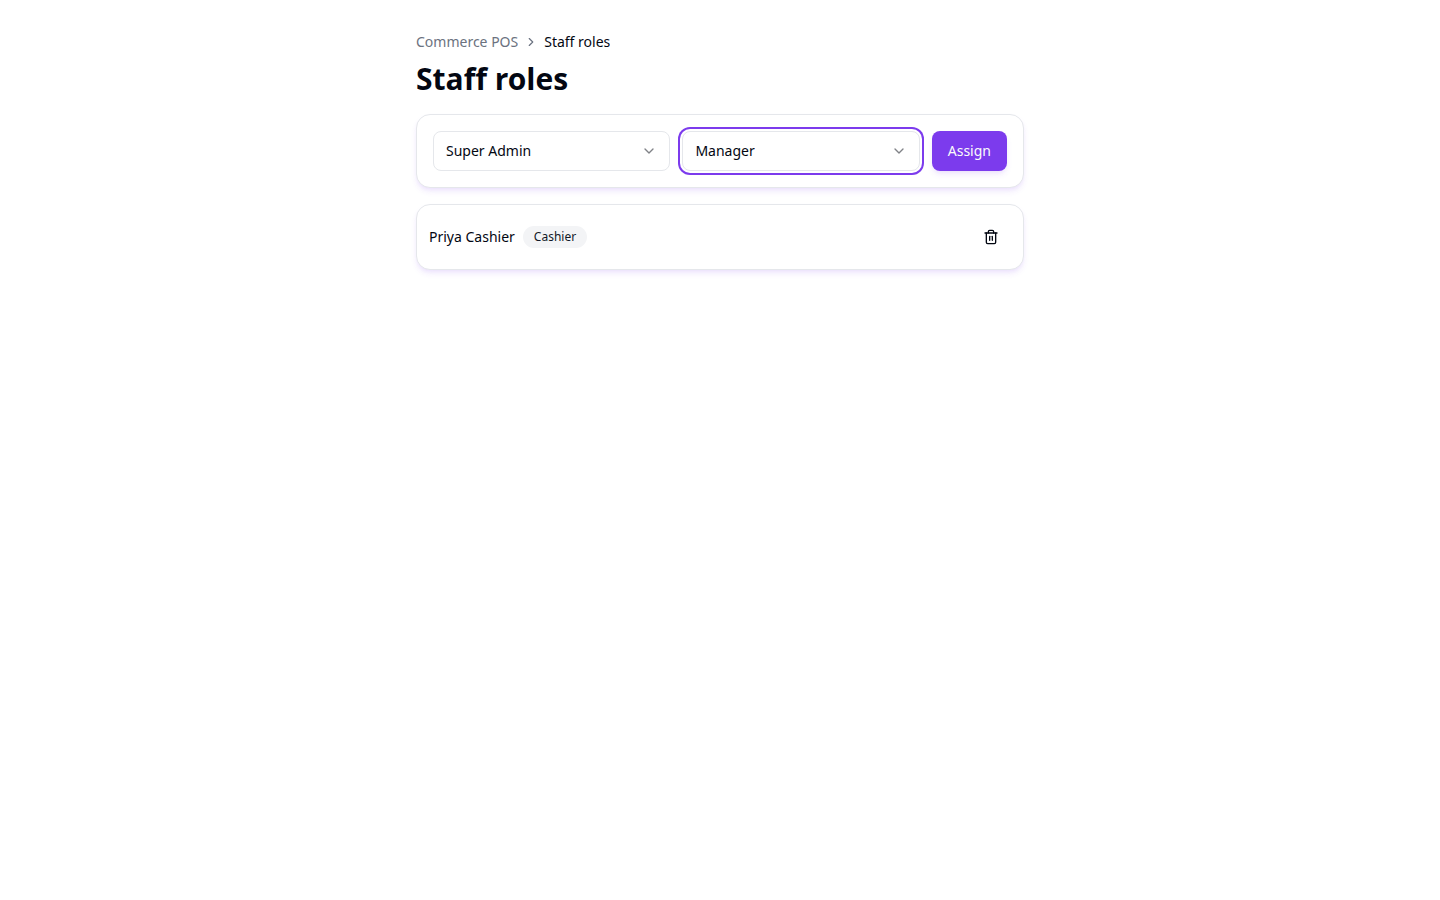
Assign – Grants that person the picked commerce role in this workspace - it doesn't touch their platform role (Owner/Admin/Agent/Member) at all.
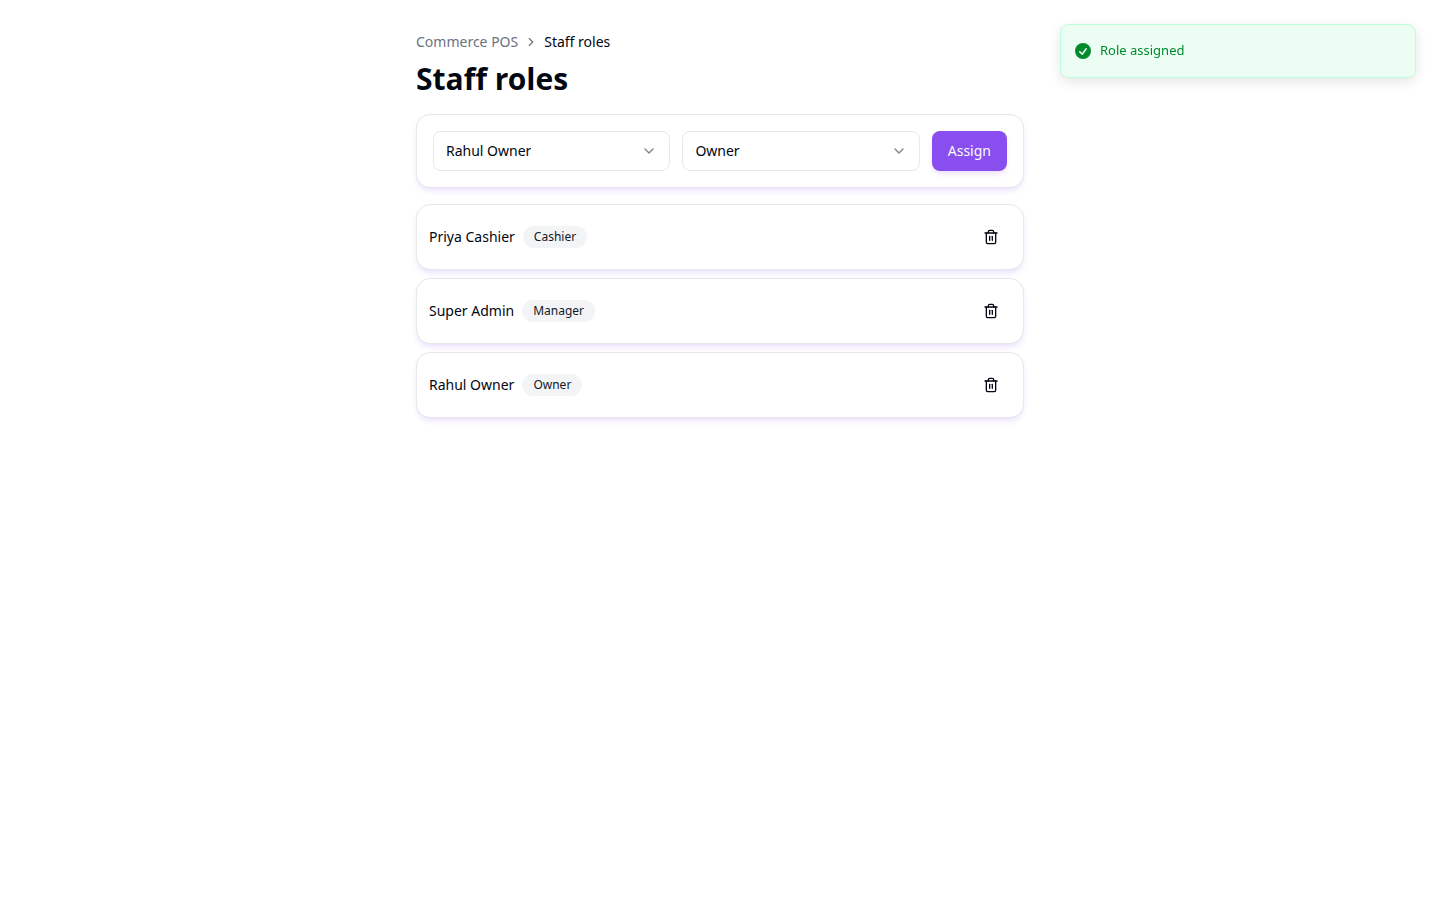
A real team usually ends up looking like this: a cashier for day-to-day billing, a manager who can approve discounts and settlements, and an owner who can do everything.
If you try to set your own PIN or open a till session before you hold a commerce role here, you'll get an error - assign yourself a role first.
3. My PIN
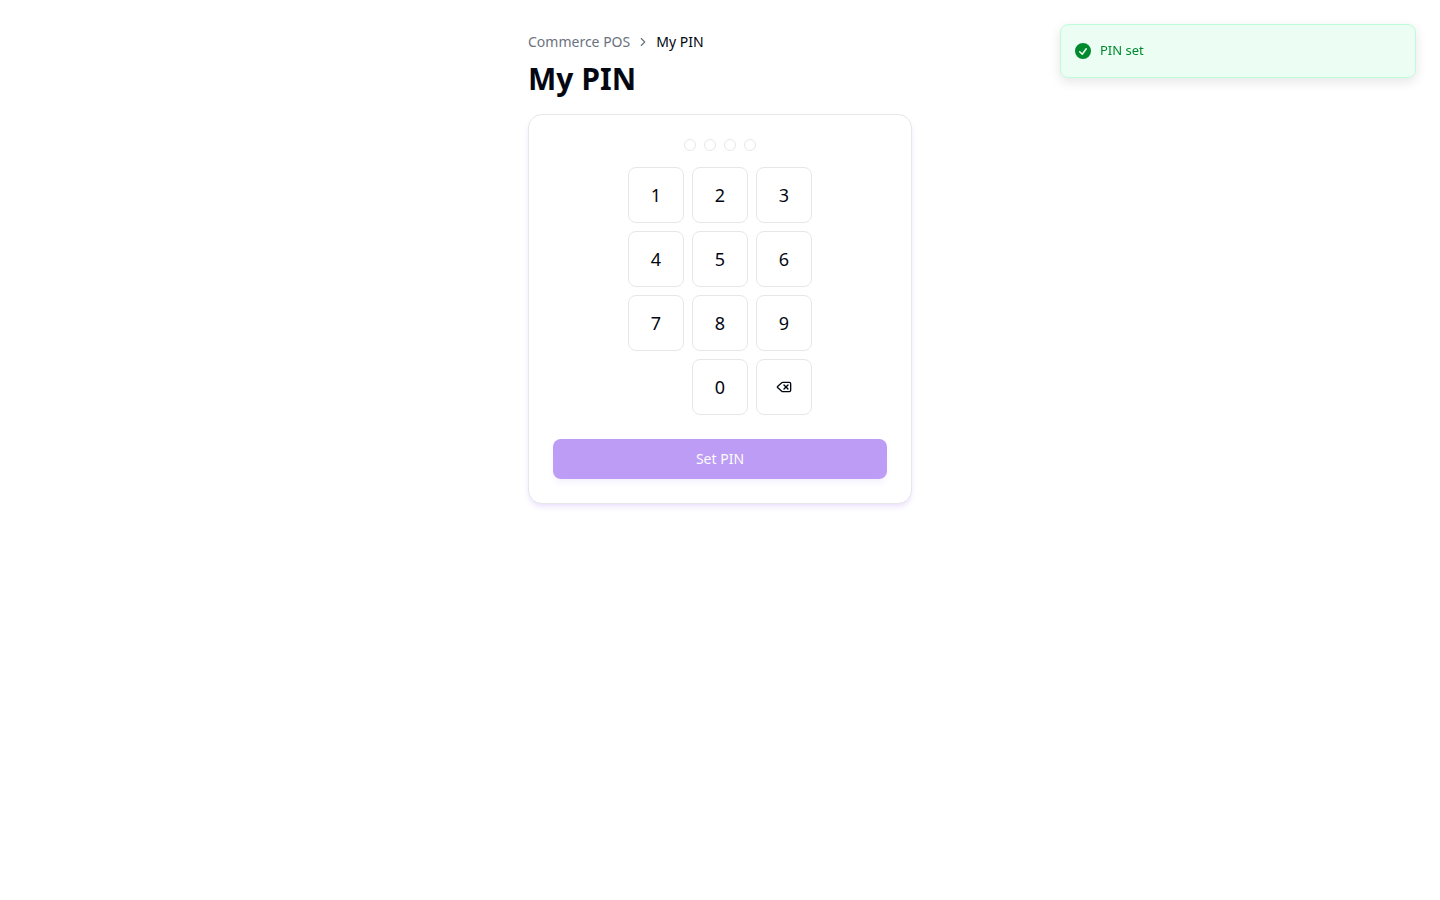
Once you hold a commerce role, set a short numeric PIN - this is how you identify yourself at a shared till without logging in and out on a shared device.
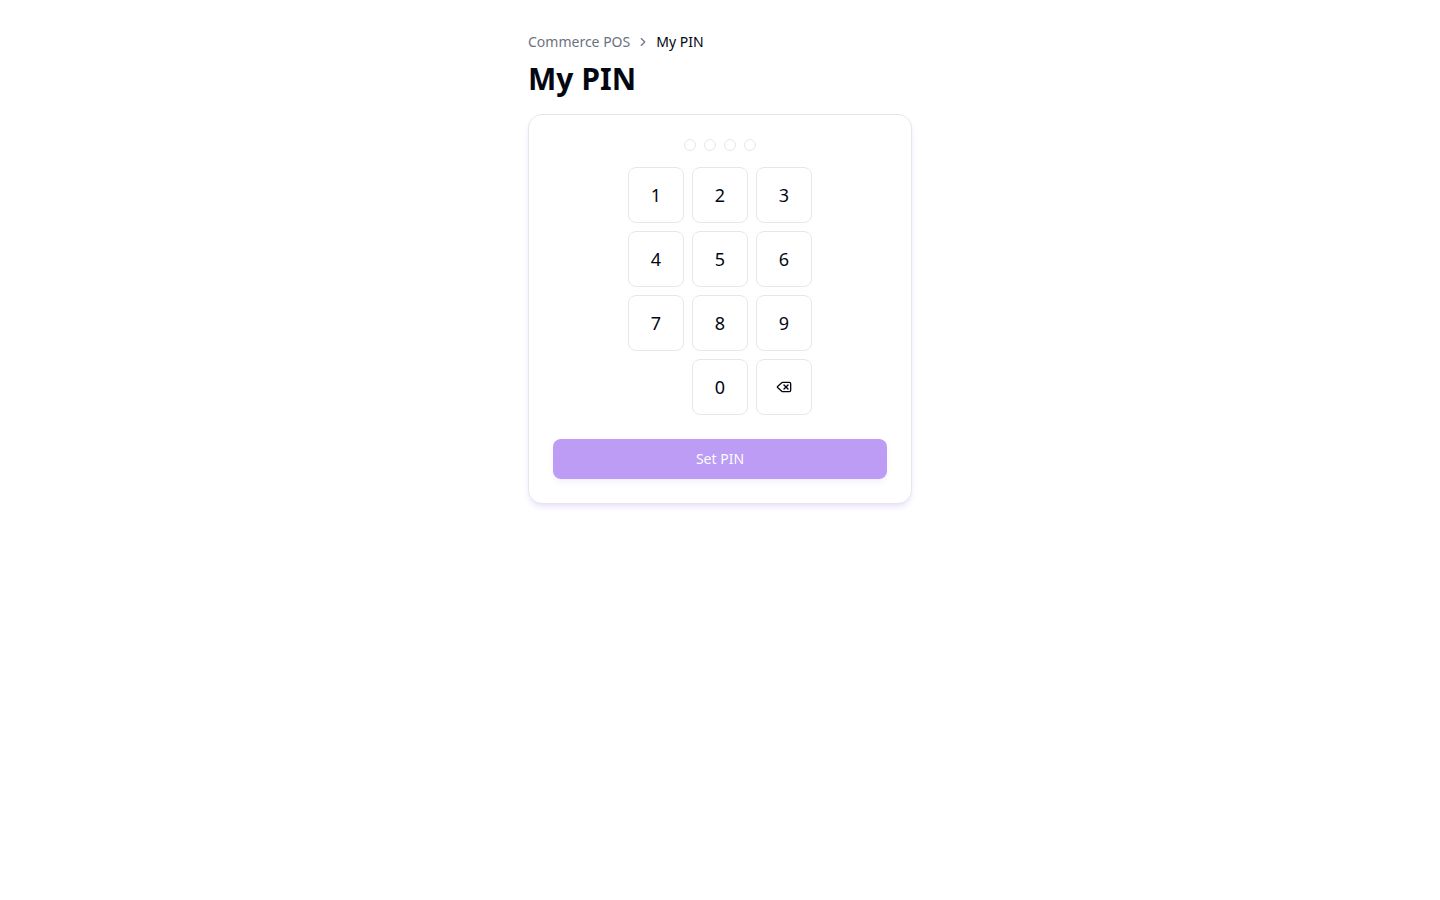
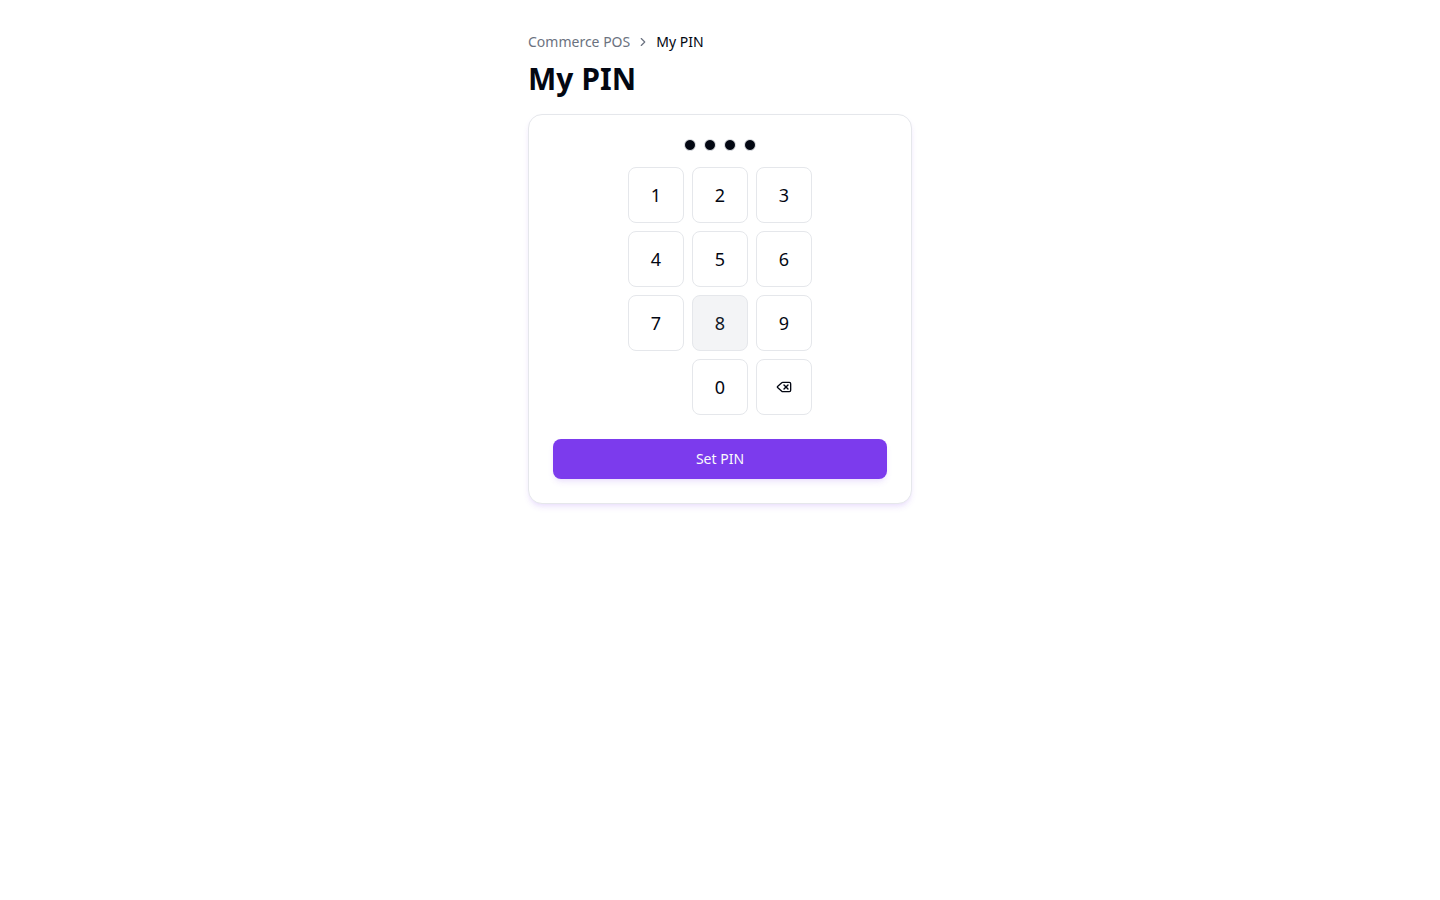
4-8 digits – Pick something quick to type at a counter, but not an obvious sequence. Never share it - actions at a shared till get attributed to whoever's PIN was used.
4. Terminals
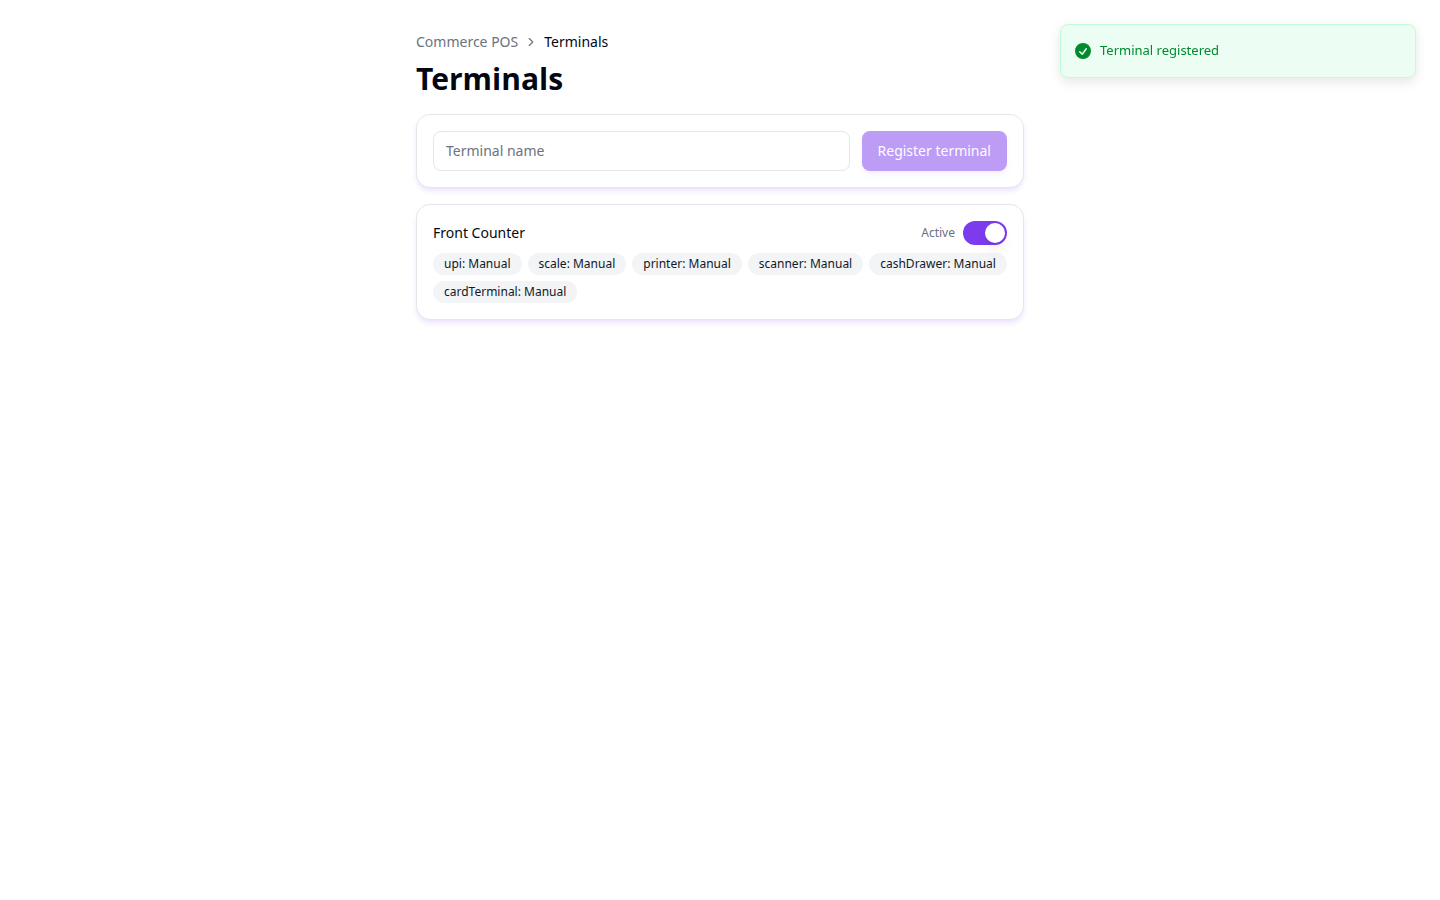
A terminal is one physical till device - a counter, a tablet, a POS machine. Register every device you'll actually bill from.
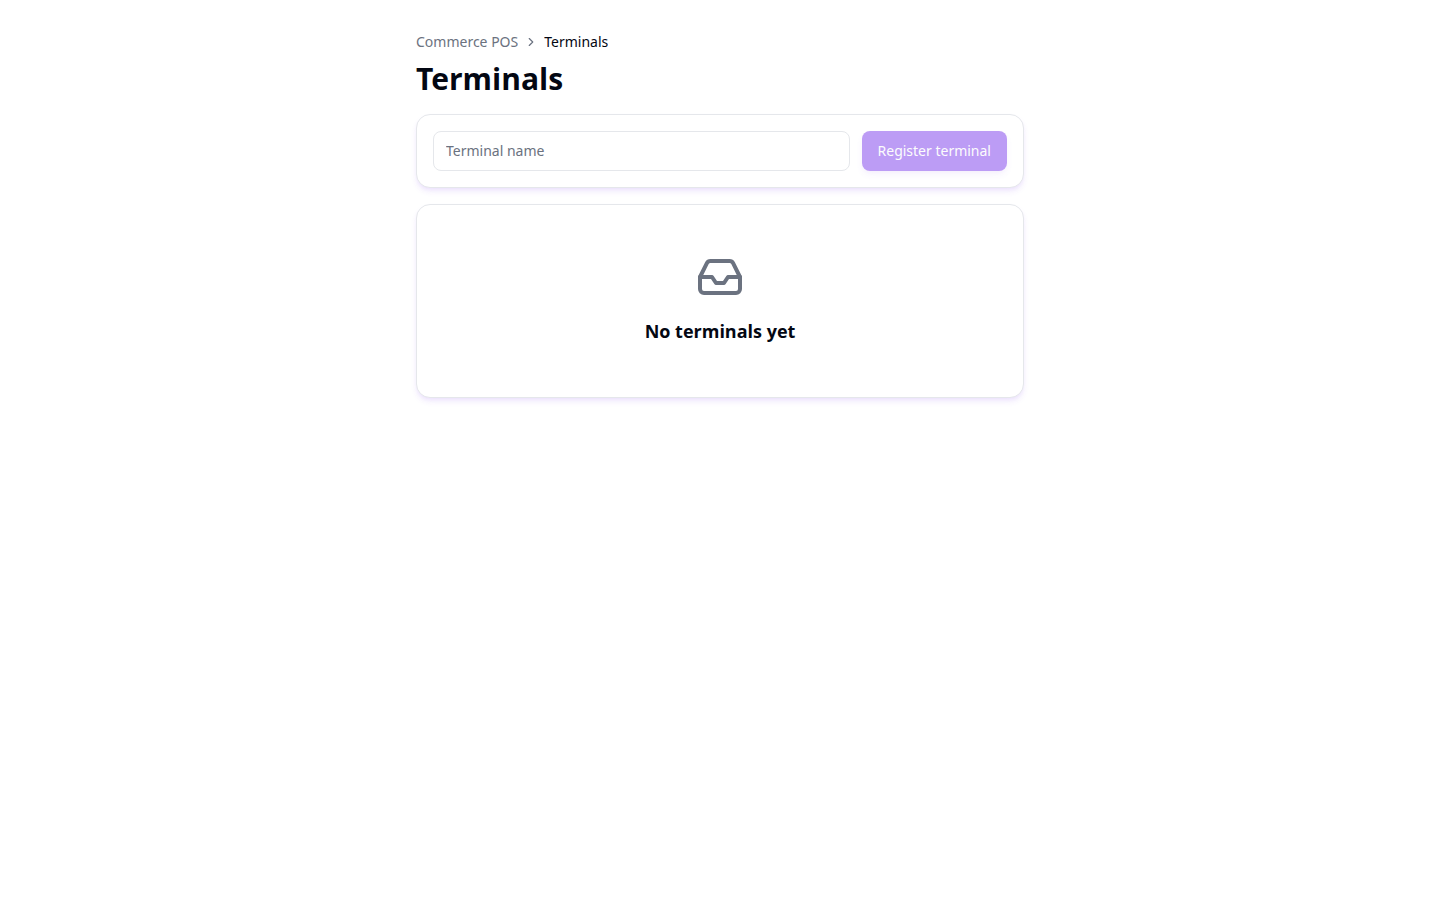
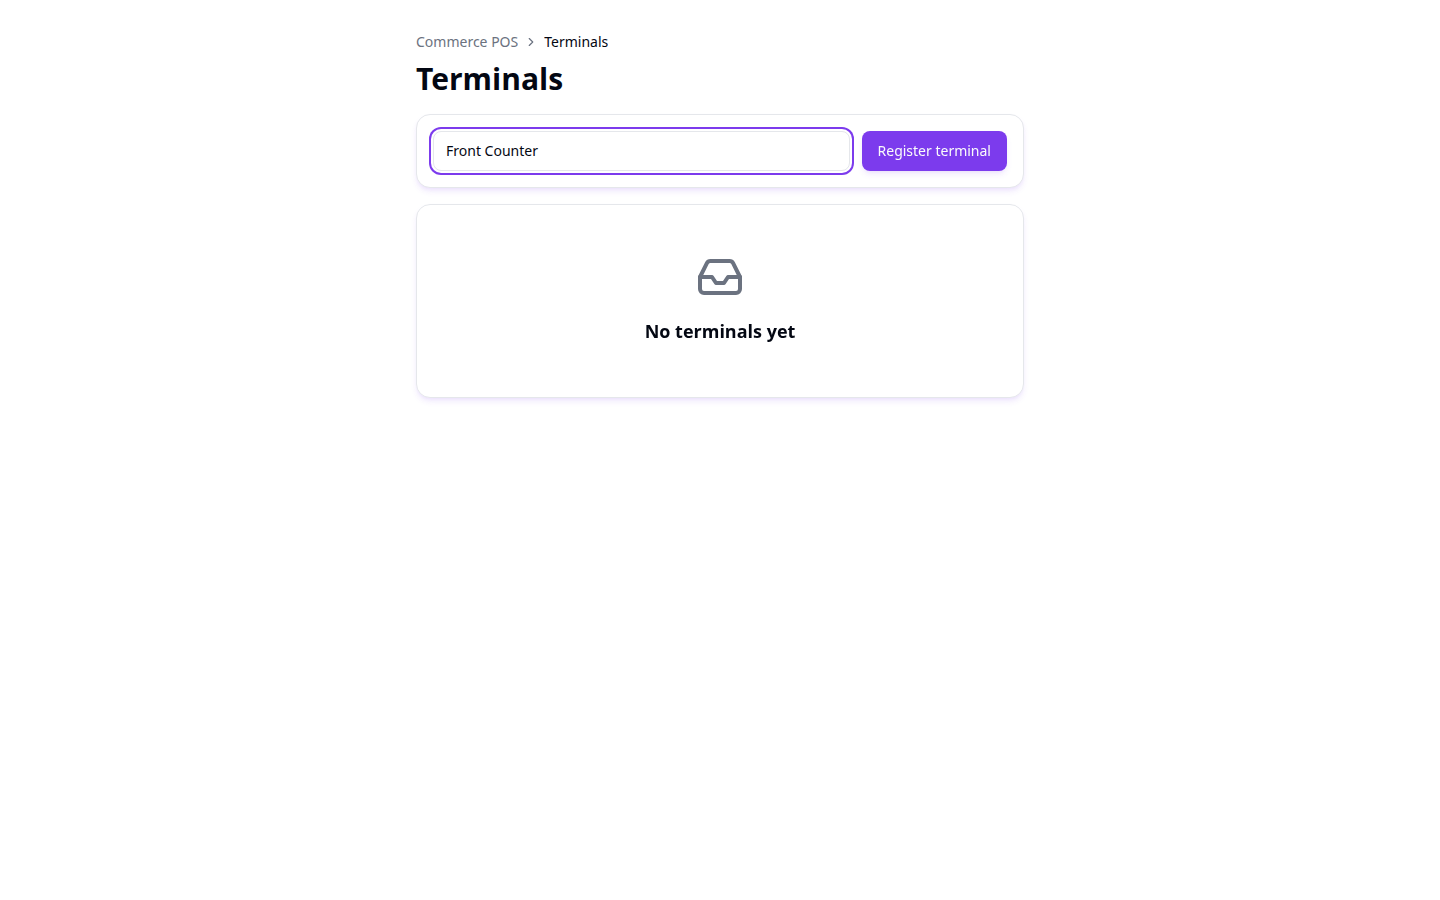
Register terminal – Every device port (scanner, UPI, card terminal, printer, cash drawer, scale) starts out set to Manual - meaning you confirm each action by hand rather than needing real connected hardware. Real hardware integrations are a later upgrade, not a requirement to start billing.
5. Reasons & pay modes
Two small masters that drive dropdowns you'll see constantly at the till.
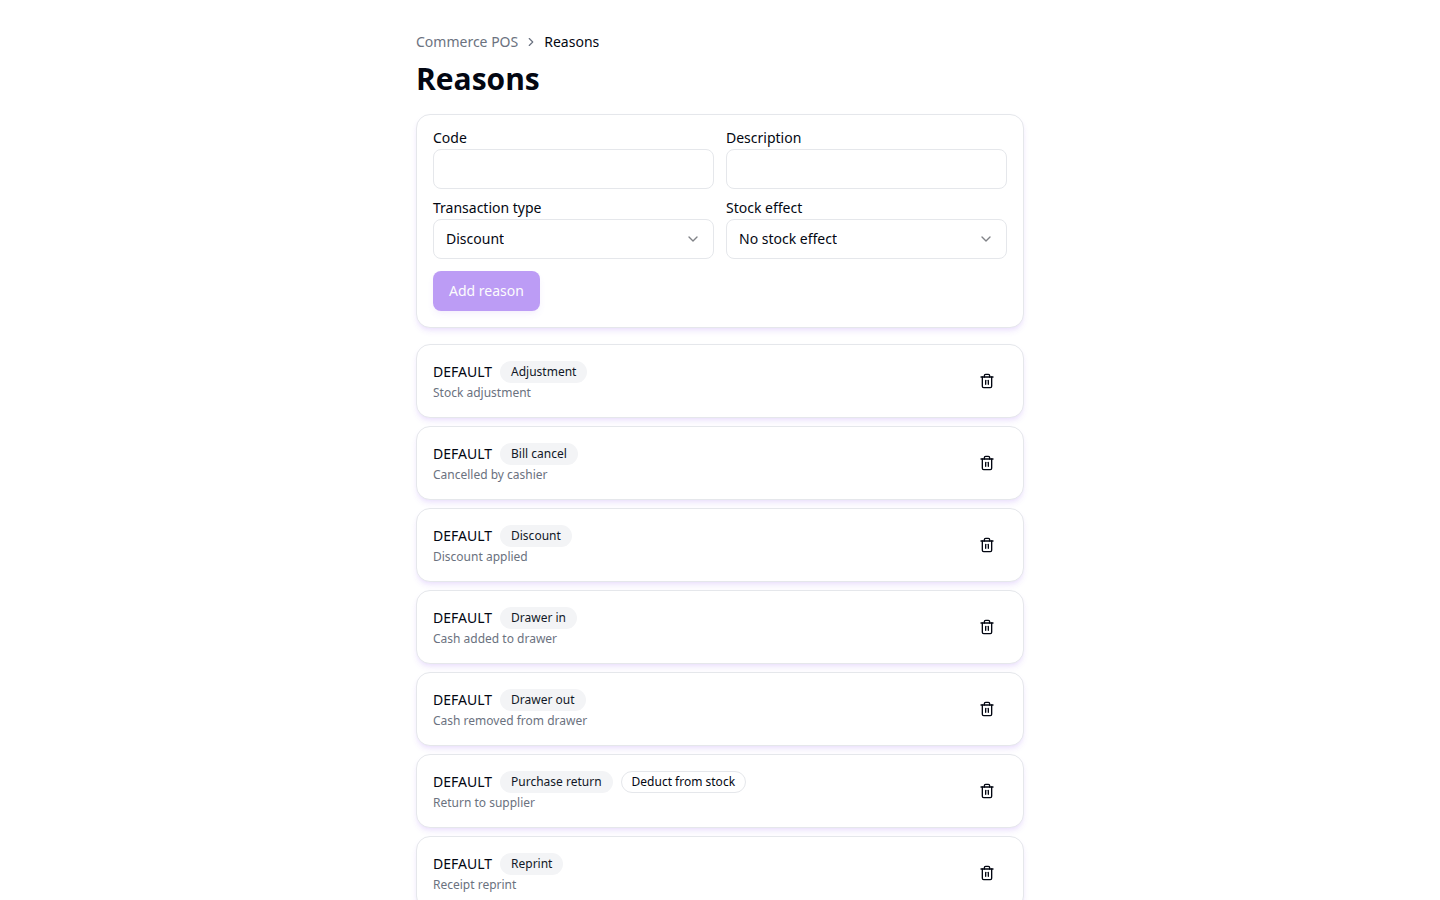
Reasons are the typed explanations required for sensitive actions - cancelling a bill, reprinting a receipt, giving a discount, returning stock. A sensible default set is already seeded for you; add your own where the built-ins don't fit (e.g. "Damaged in transit").
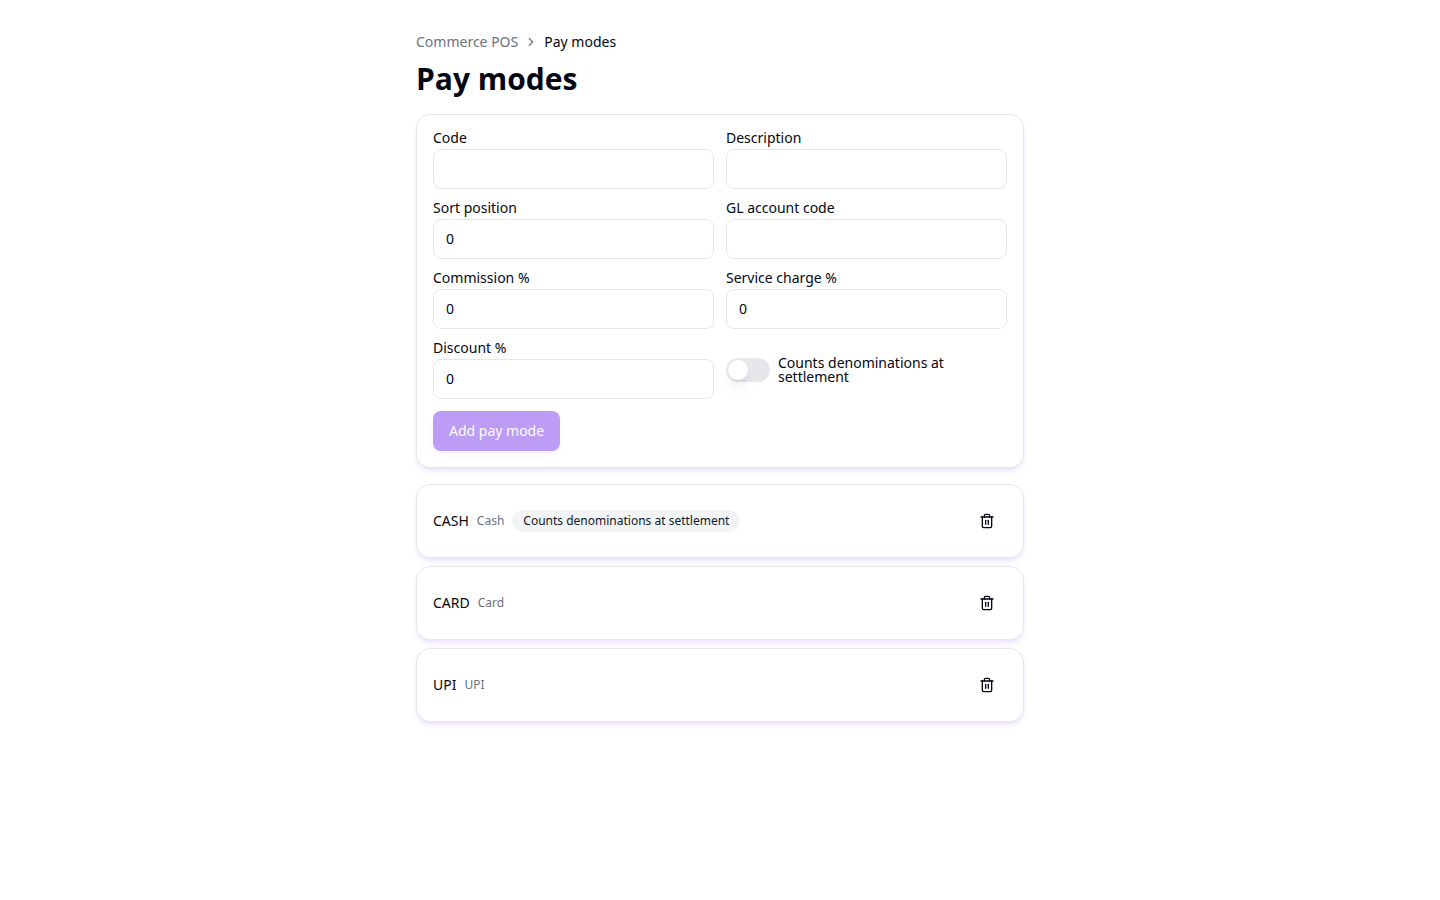
Pay modes are the tender types your till offers at checkout - Cash, Card, and UPI are seeded by default. Add more (cheque, wallet, store credit) if you accept them, with an optional commission/service-charge percentage and GL account code for your books.
6. The go-live checklist
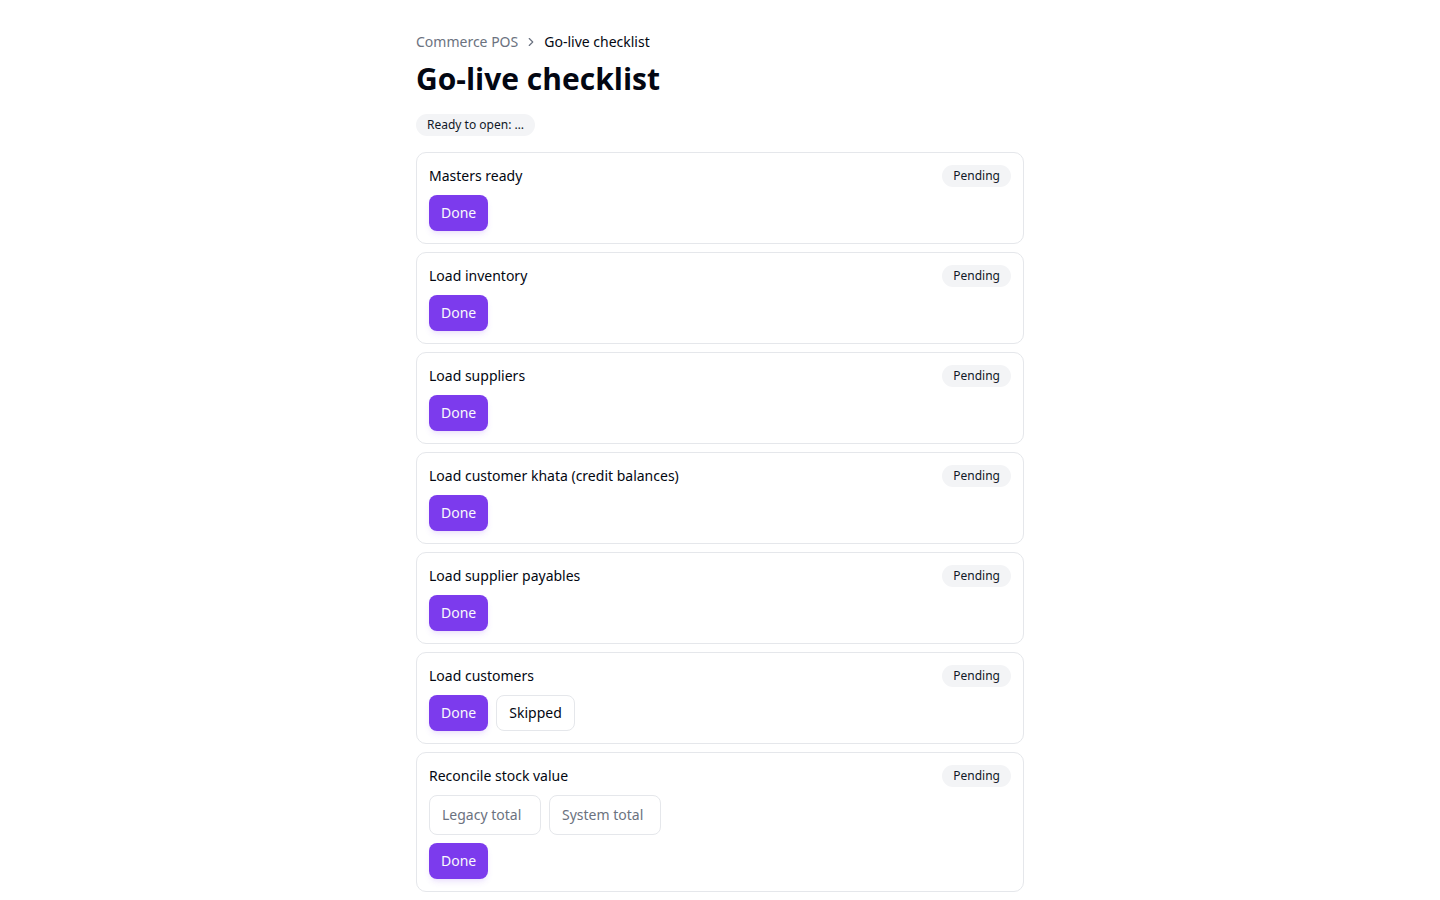
This is your literal punch list before opening for real trade: masters ready, inventory loaded, suppliers loaded, customer credit balances and supplier payables carried over from your old system (if any), and a final reconciliation of your legacy stock value against what the system computes.
You don't tick these off on trust. Every step is checked against your actual data and reports what it found - "12 active products", or "No departments yet". A step the system can't confirm can't be marked Done; the chip tells you what's missing and Set it up → takes you straight to the screen that fixes it.
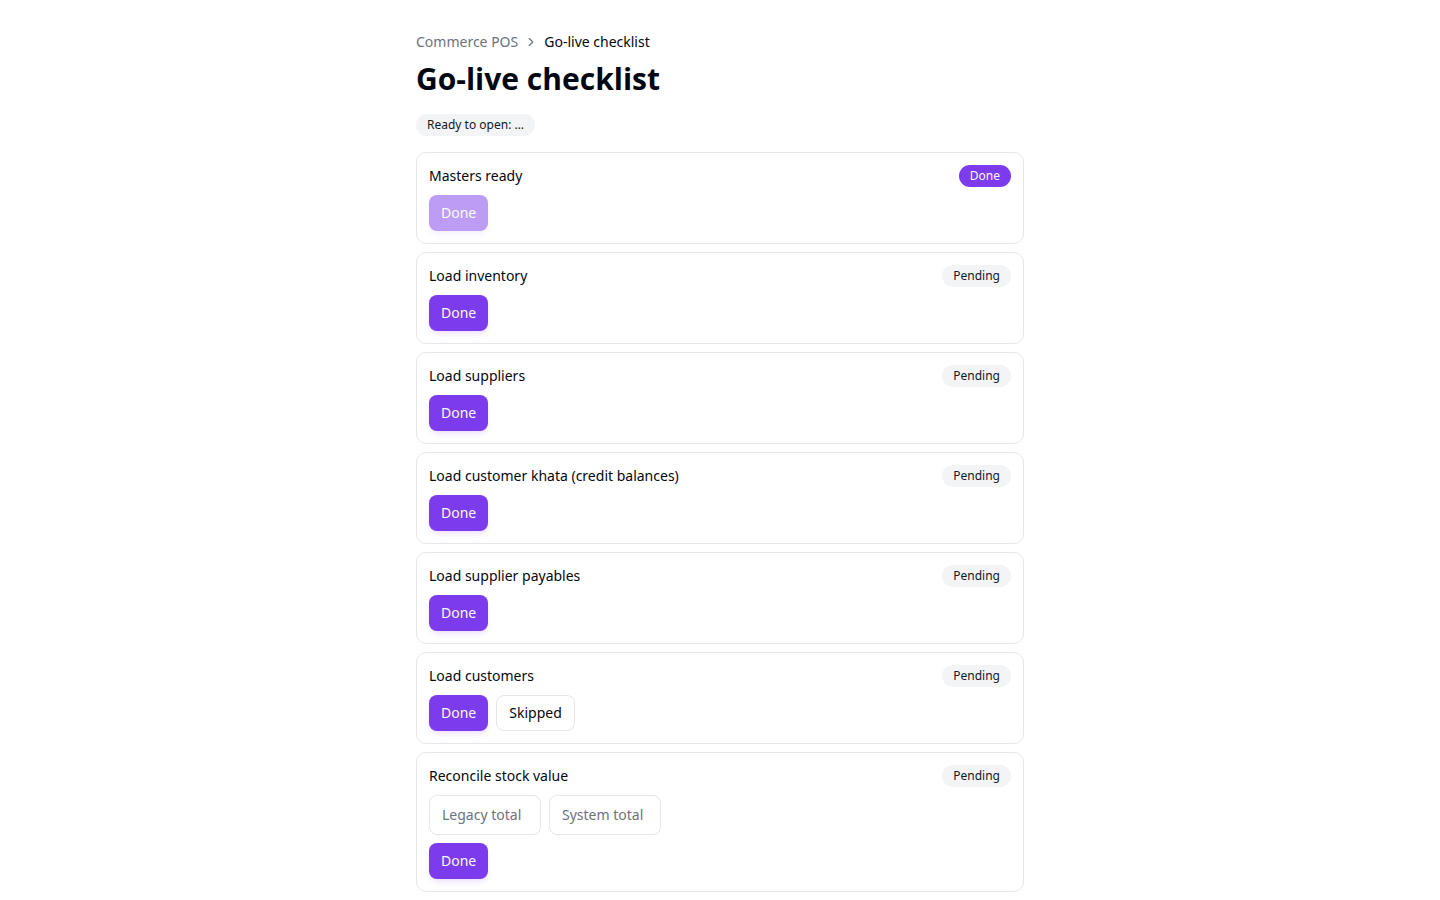
The check – What the system actually found. Amber means this step isn't done yet - here, no departments have been created, so Done is greyed out.
Skip – The honest answer for a step that doesn't apply to you - no legacy khata to carry over, no opening payables. Skipping is always allowed, even when the check fails.
Done – Available once the check passes. When every step is Done or Skipped, the checklist reports you're ready to open your first real business day.
The two Reconcile steps work slightly differently: the system fills in its own figure for you, and you type in what your old system says. They only accept Done when the two numbers match - that's the whole point of reconciling.
With that done, you're ready for the real day-to-day: the product catalog and purchasing chain below, then opening your first business day and billing.
The product catalog
Everything from here down lives in the main app, not the POS: stock work under Inventory → Stock, and the buying chain under Inventory → Purchasing. The reference data these screens draw on (categories, units, barcodes, labels, vendor masters) is set up once under Settings → Inventory reference data.
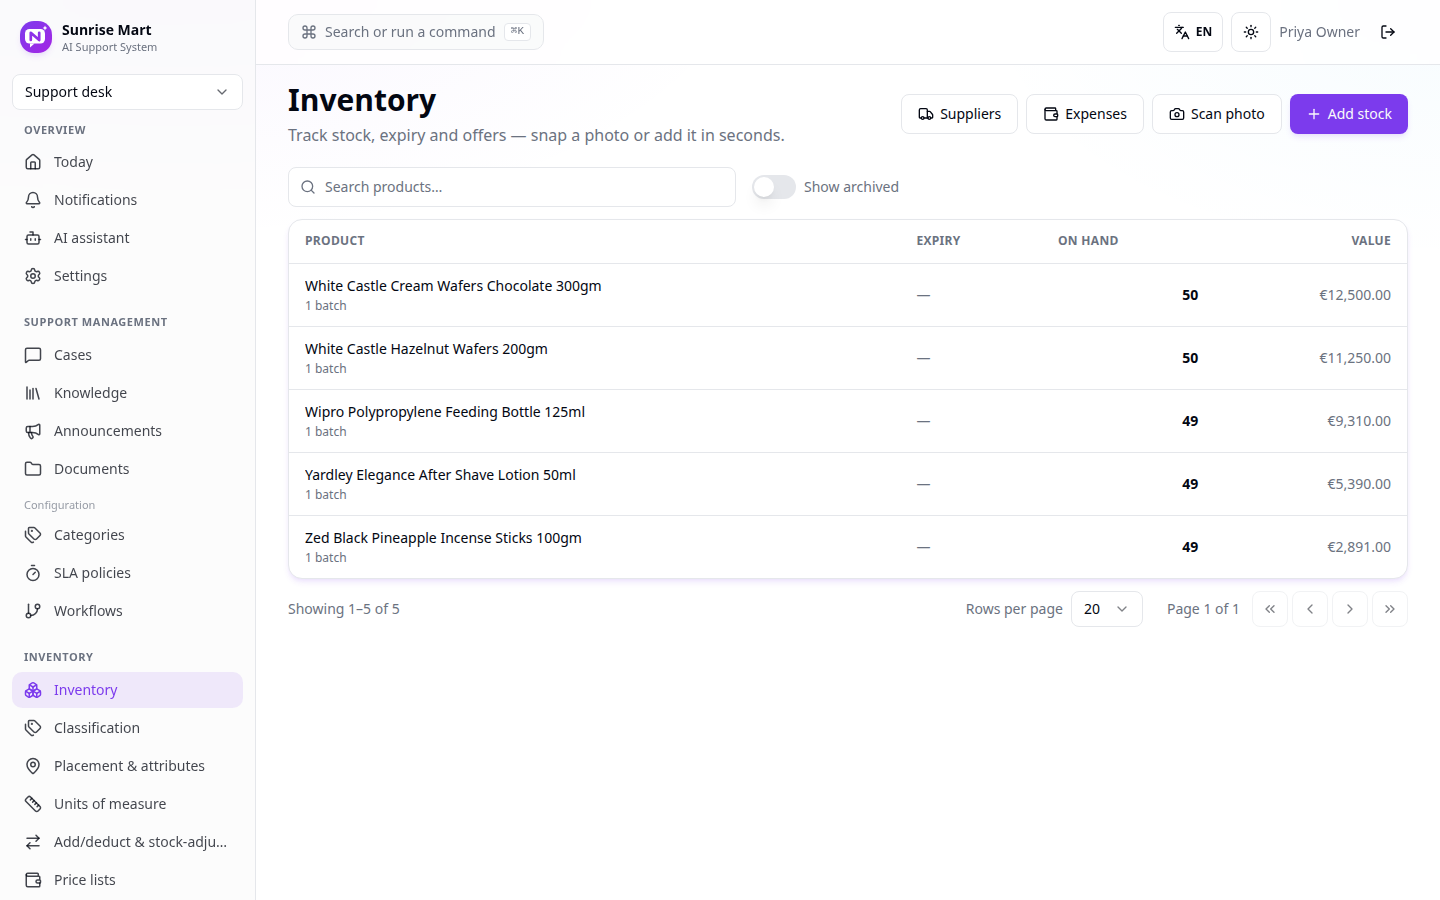
Every product shows its on-hand quantity and stock value at a glance, batch-aware (a product can have several batches at different costs or expiry dates - "1 batch" here just means nothing's split yet). Search narrows the list instantly; Show archived brings back discontinued items if you need to reference one.
Adding stock quickly
Click Add stock for the fast path - useful for a small shop that doesn't need a full purchase order for every delivery.
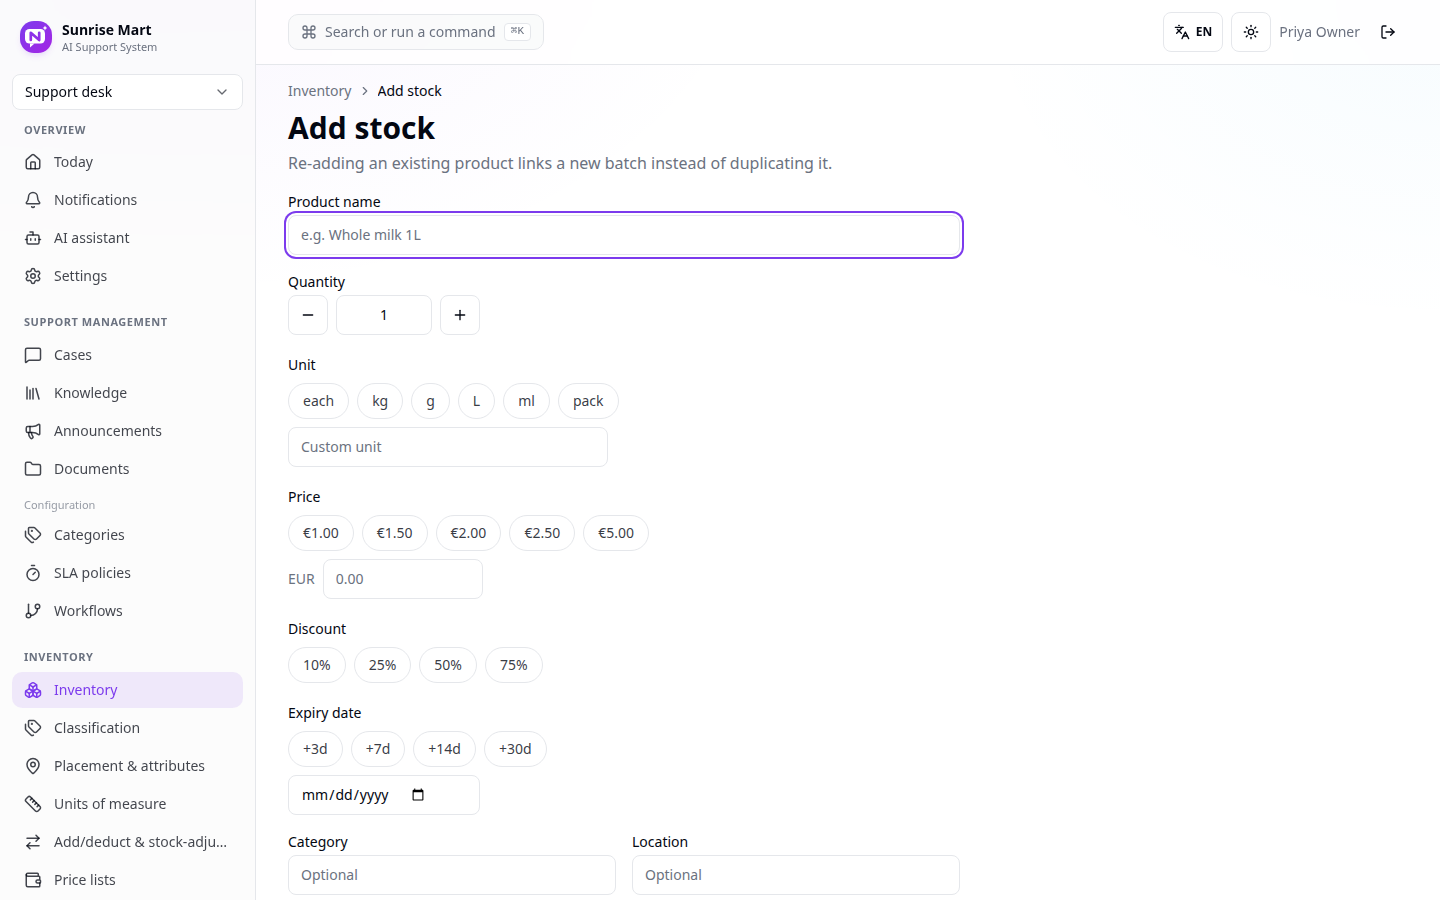
Type a product name - if it matches an existing product, this adds a new batch to it rather than creating a duplicate. The price/discount/unit chips are shortcuts; you can always type an exact value instead. Category and Location are optional.
For anything you'll want a paper trail on - a real supplier invoice, GST input credit, a payment due date - use the full Purchase order → Goods acknowledgement → GRN chain below instead. Add stock is for the quick, informal case.
Suppliers
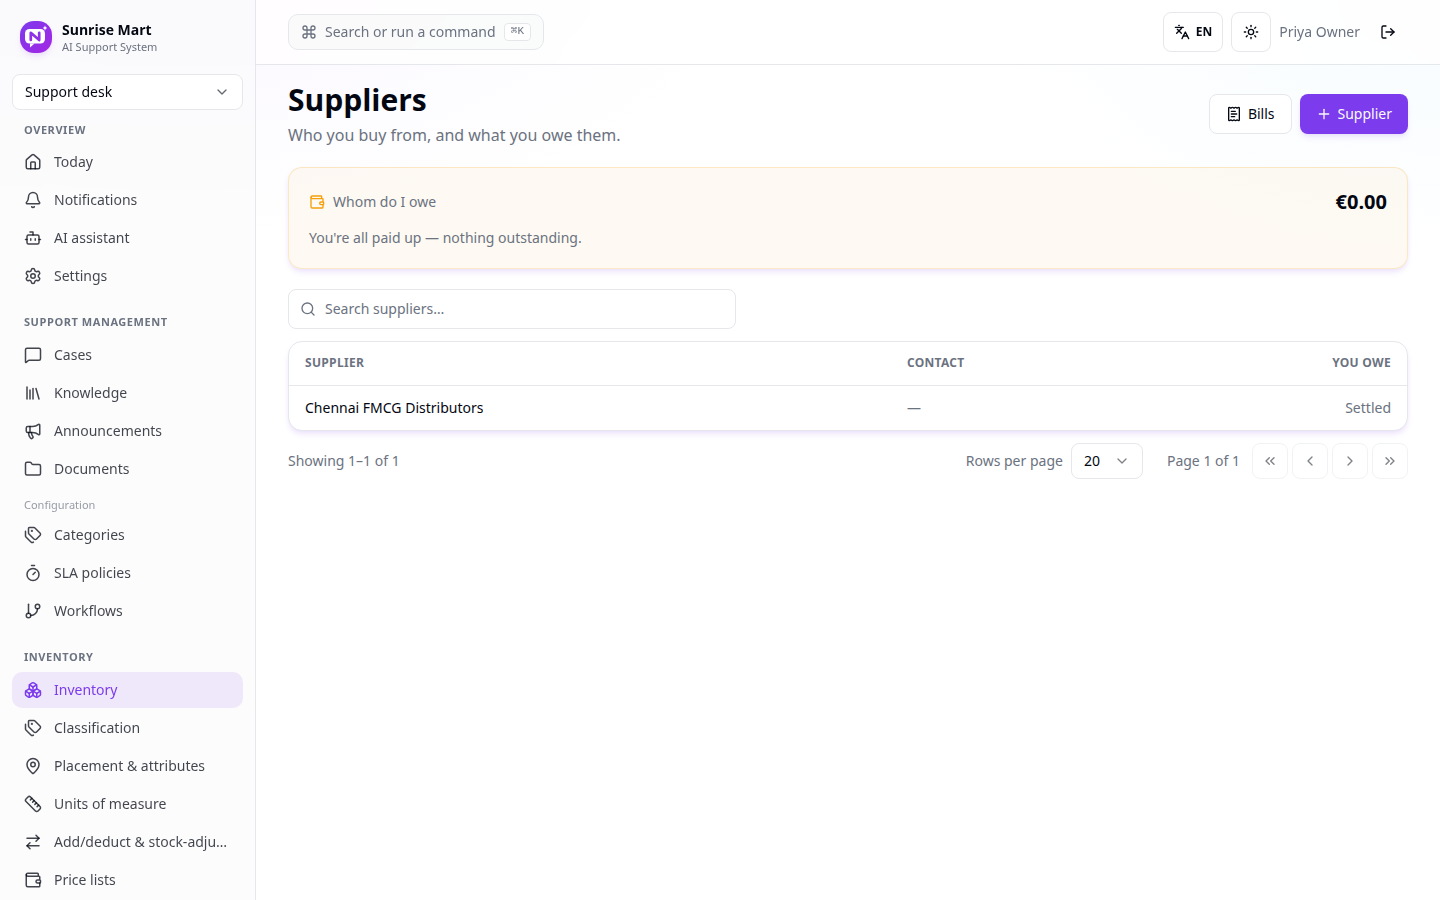
The "Whom do I owe" banner is a live rollup across every open bill - click into a supplier at any time to see their own balance and history.
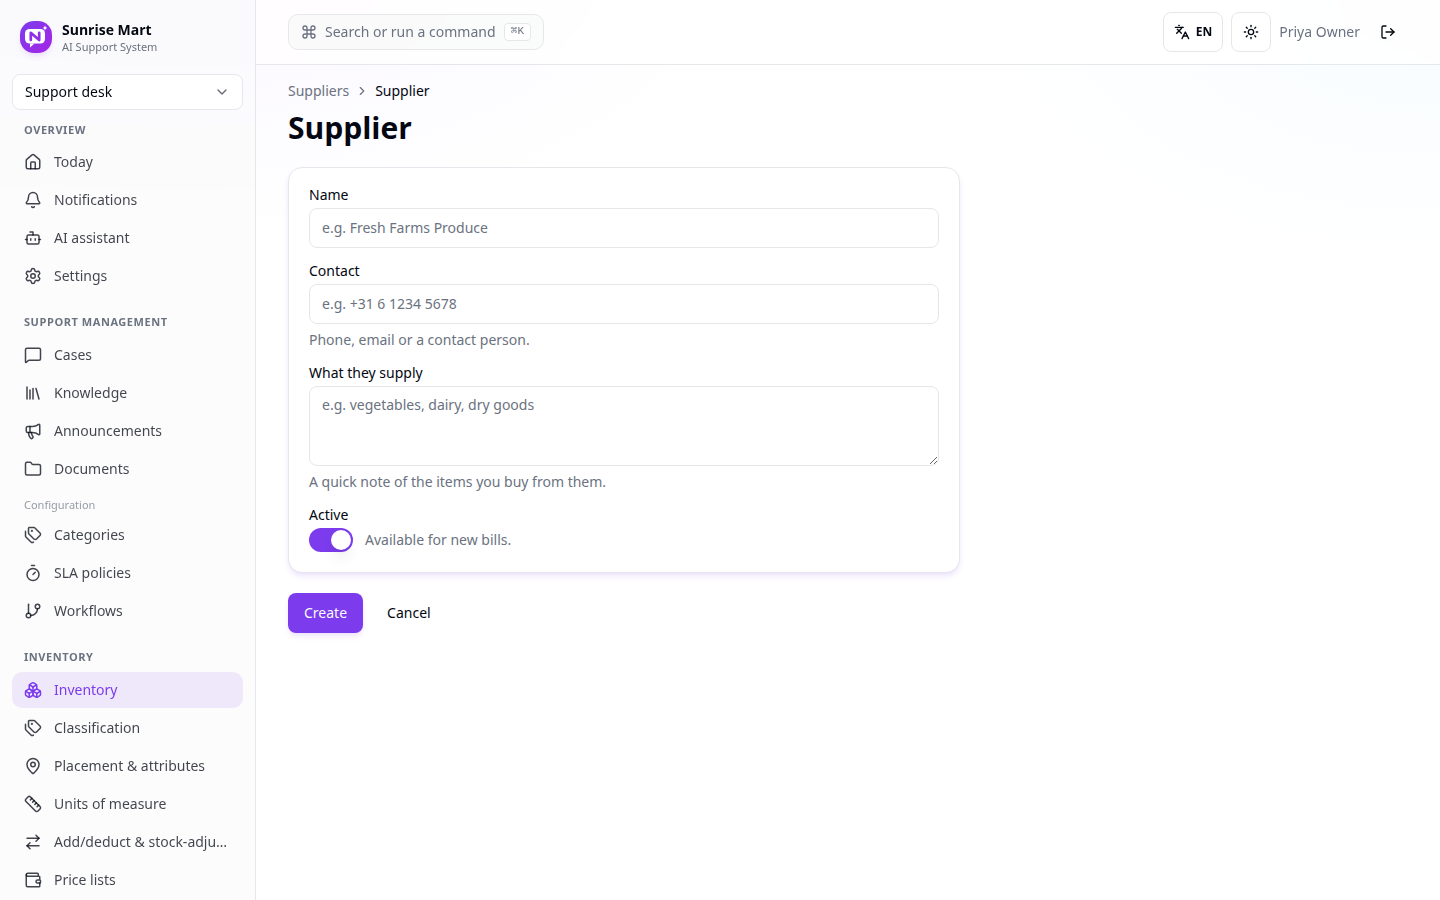
Only Name is required. Active controls whether the supplier shows up when creating a new bill or purchase order - turn it off instead of deleting a supplier you've stopped using, so old bills keep their history.
The purchasing chain
This is the full paper trail from "I want to order stock" to "it's on the shelf and the supplier is owed money": Purchase order → Goods acknowledgement → GRN. Each stage is a real, separate document - nothing is skipped or implied.
1. Purchase order
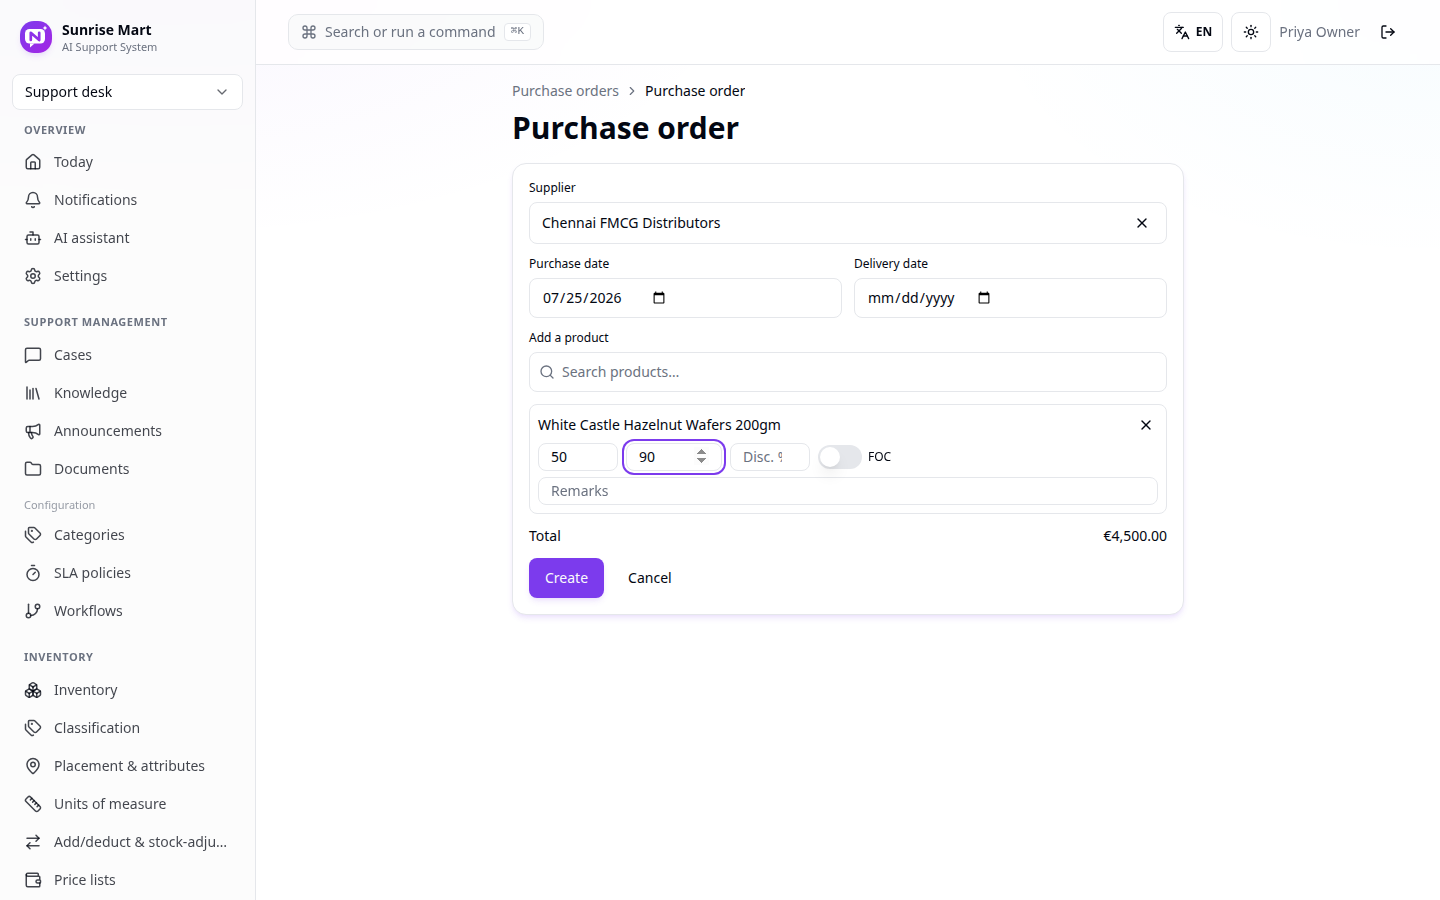
Unit cost – This is what makes the order real money - qty × unit cost (minus any line discount) is the line total. Toggle FOC for a free-of-cost line (stock still arrives, but it's not billed).
Search the supplier, pick a purchase/delivery date, then search and add as many product lines as you need. Click Create - the order starts as a Draft.
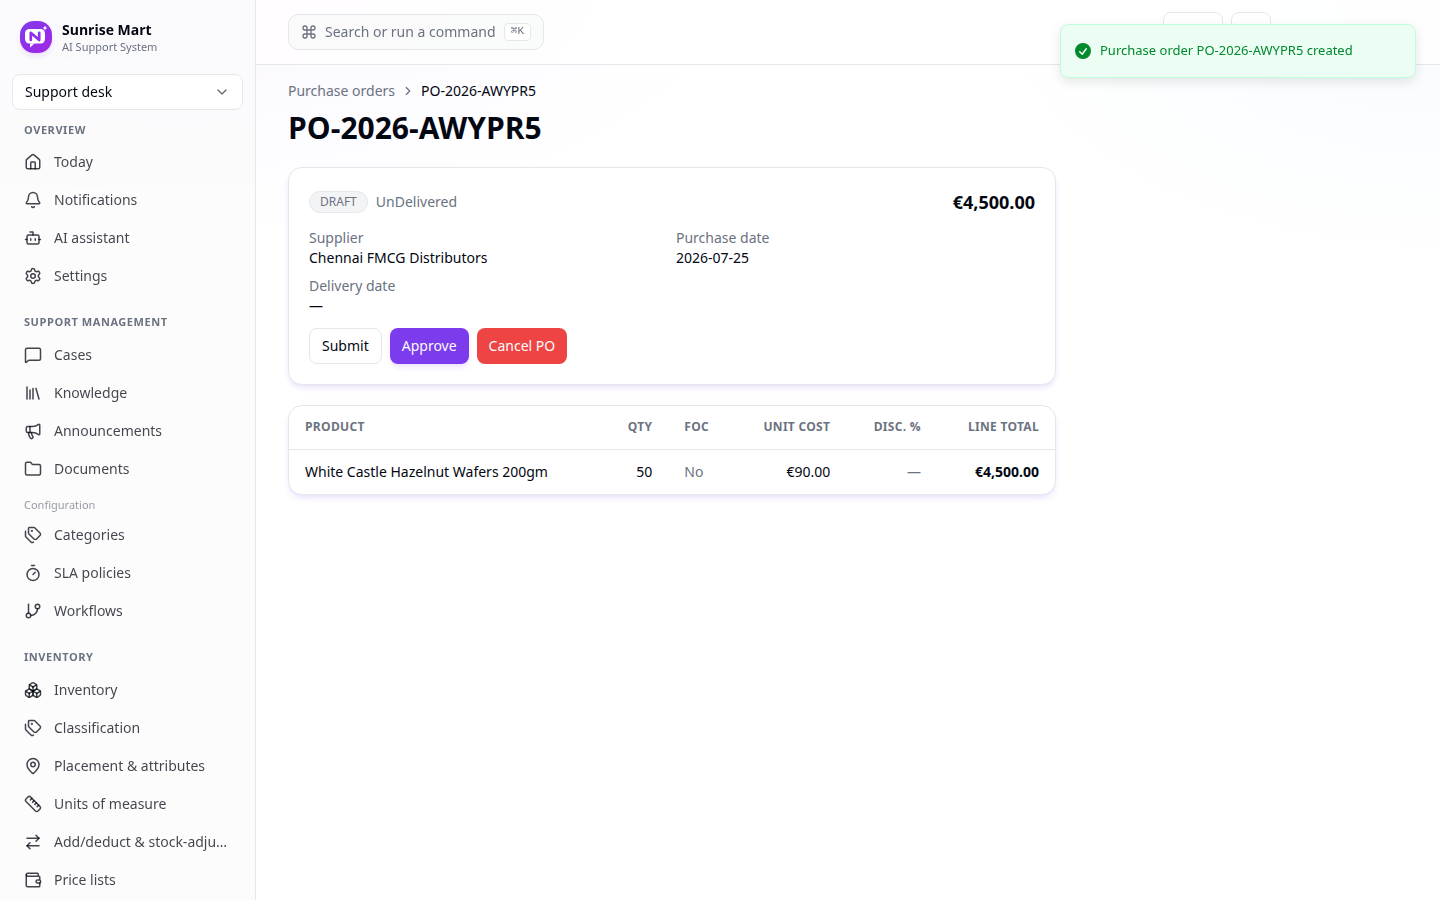
Approve – A draft PO can still be freely edited. Approving locks the lines - after this, unapprove first if something needs to change.
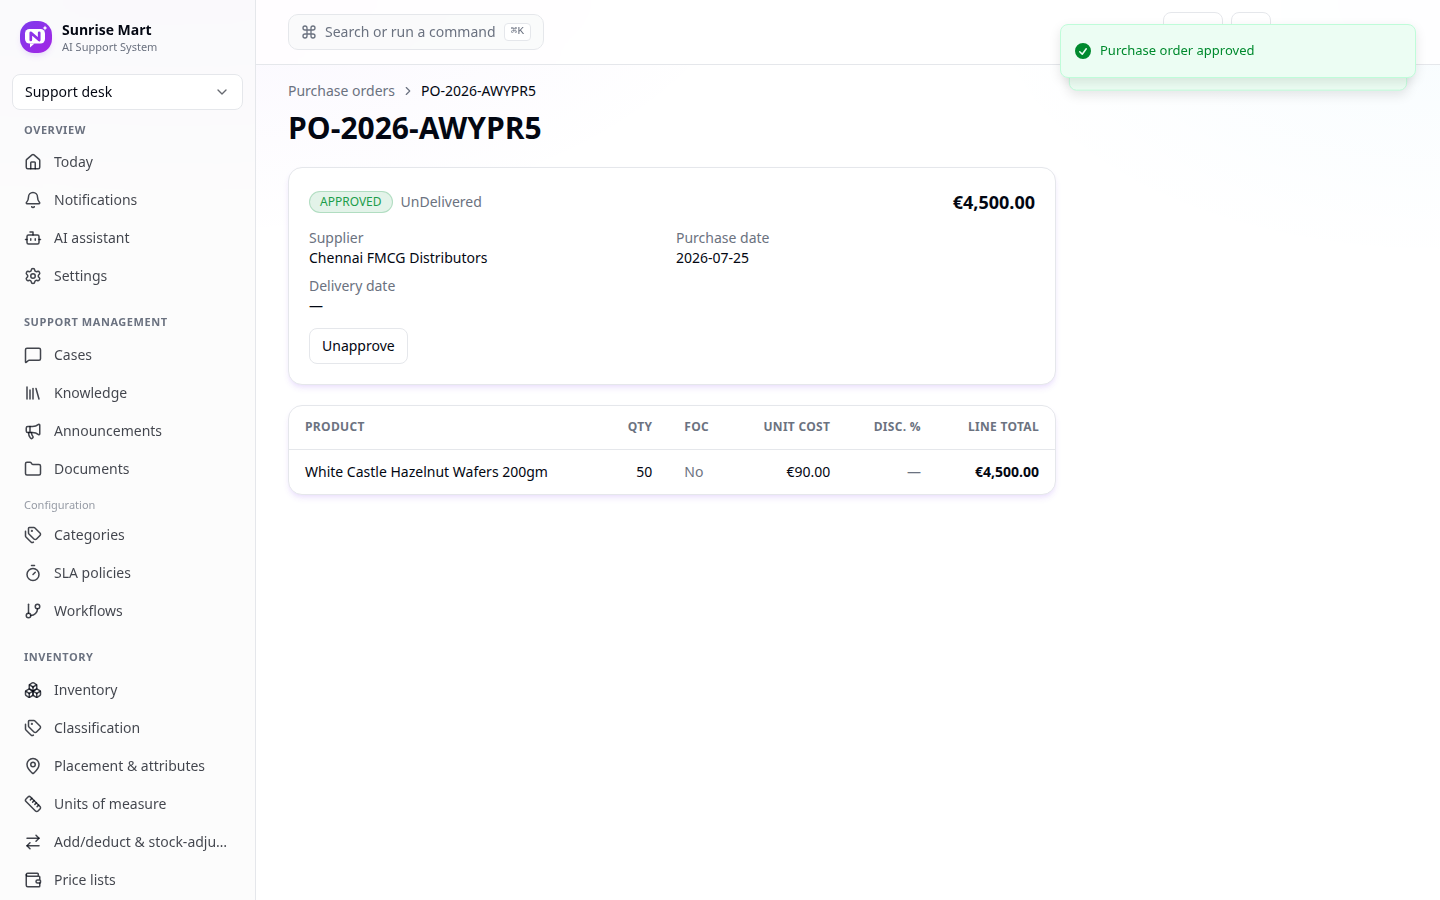
The delivery status ("UnDelivered" here) tracks itself automatically - it flips once a Goods acknowledgement references this order, and again once a GRN is actually posted against it.
2. Goods acknowledgement
A lightweight "the truck arrived" record - registered the moment goods show up at the door, before anyone's had time to count and check quality.
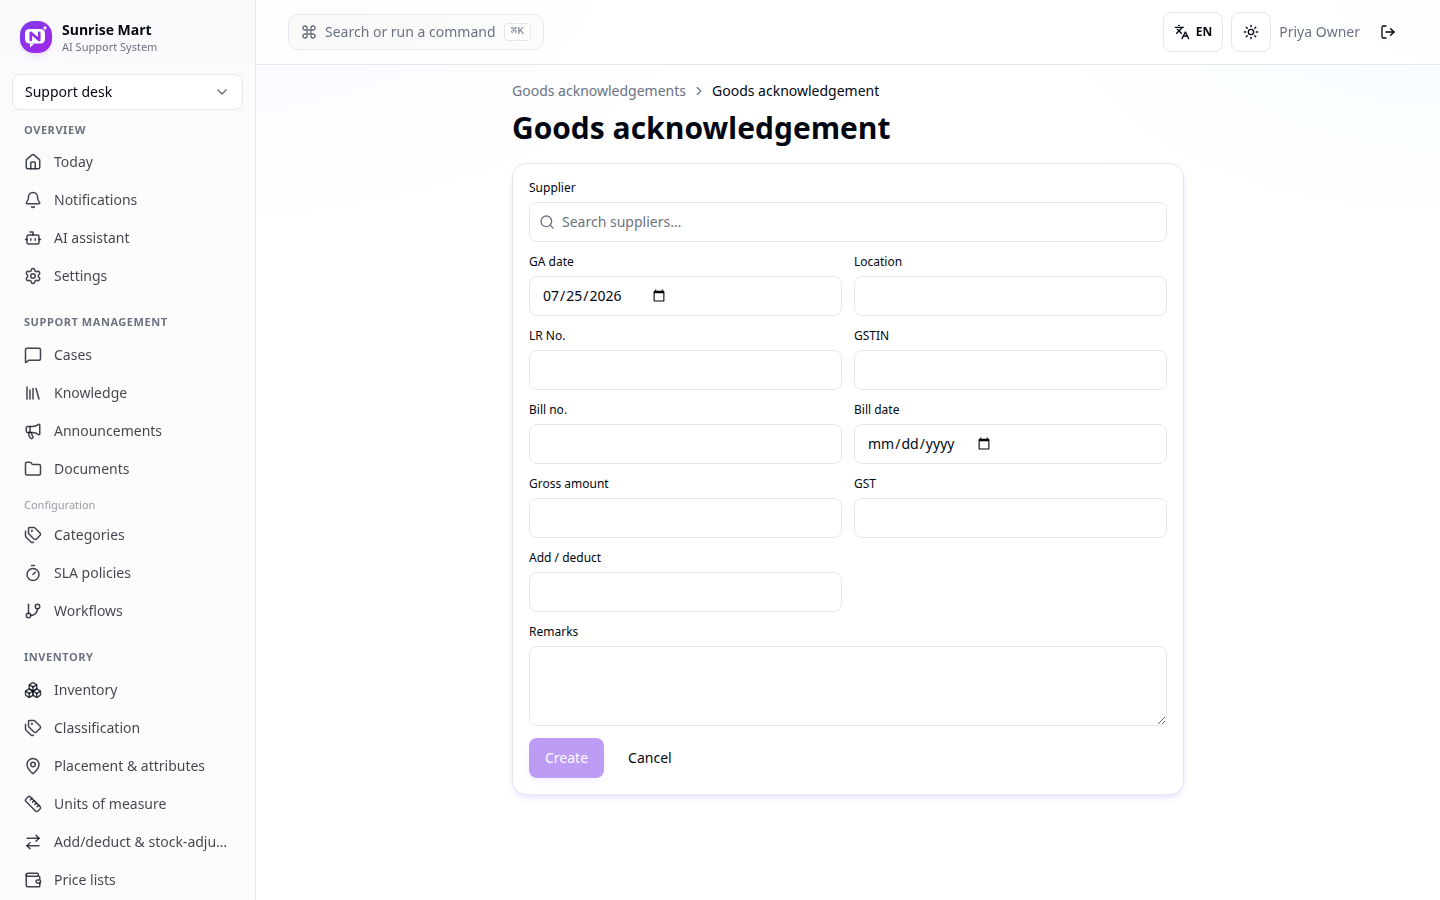
Pick the supplier, then fill in whatever's on the delivery paperwork - LR number, the vendor's own bill number/date, gross amount and GST if you have them yet. Nothing here is final; it's a placeholder for "something arrived, we'll reconcile it properly at GRN time."
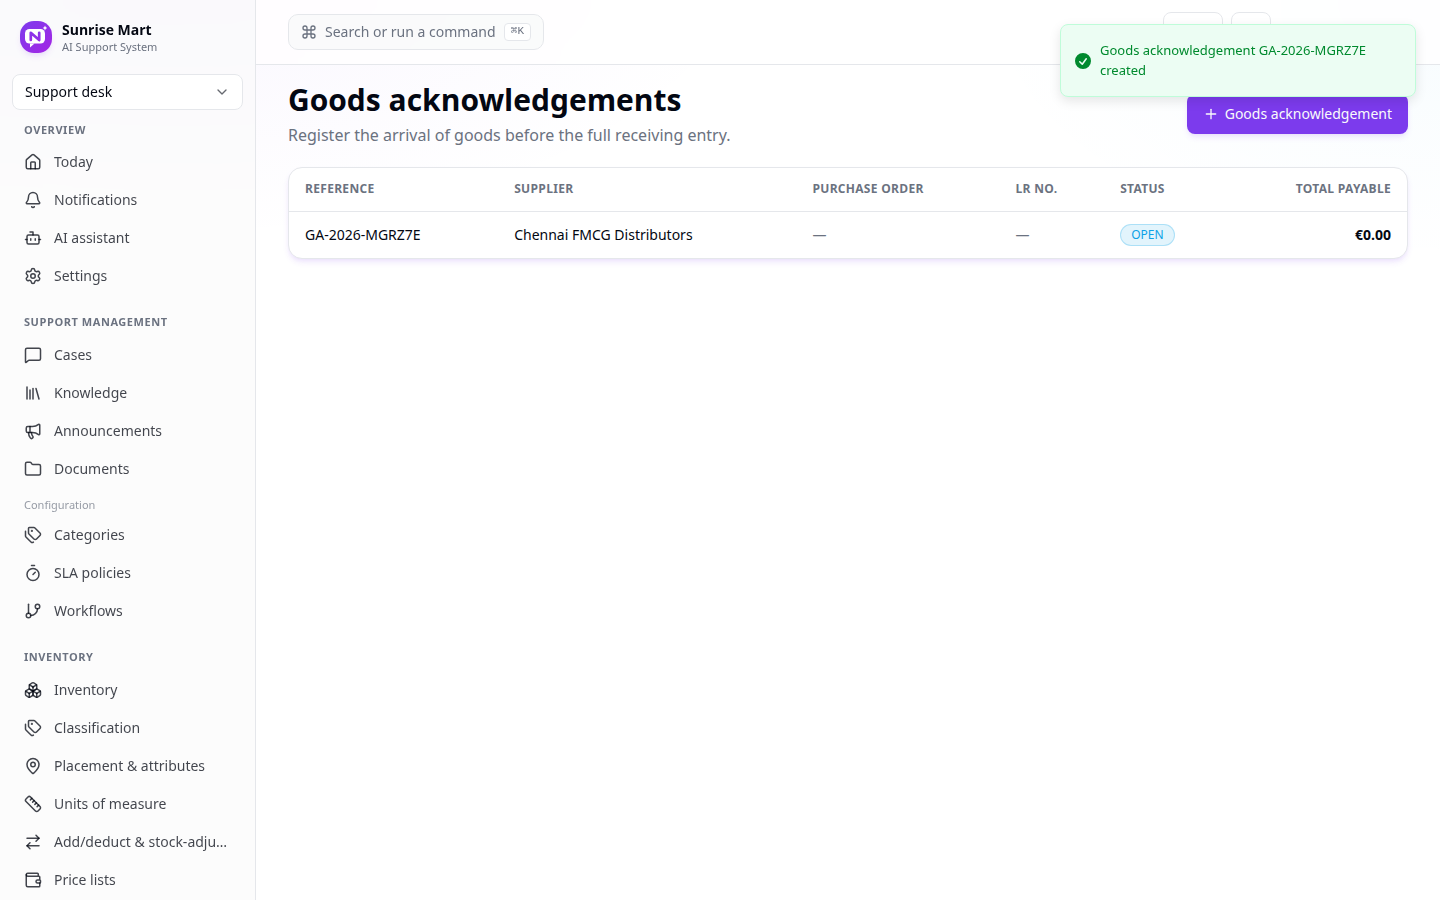
An Open acknowledgement is exactly what the next GRN step looks for.
3. GRN (goods receipt note) - the step that actually moves stock
This is where quantities get counted for real, cost/GST gets entered line-by-line, and - once posted - stock and the supplier's payable both update for real. Nothing before this point touched your actual inventory numbers.
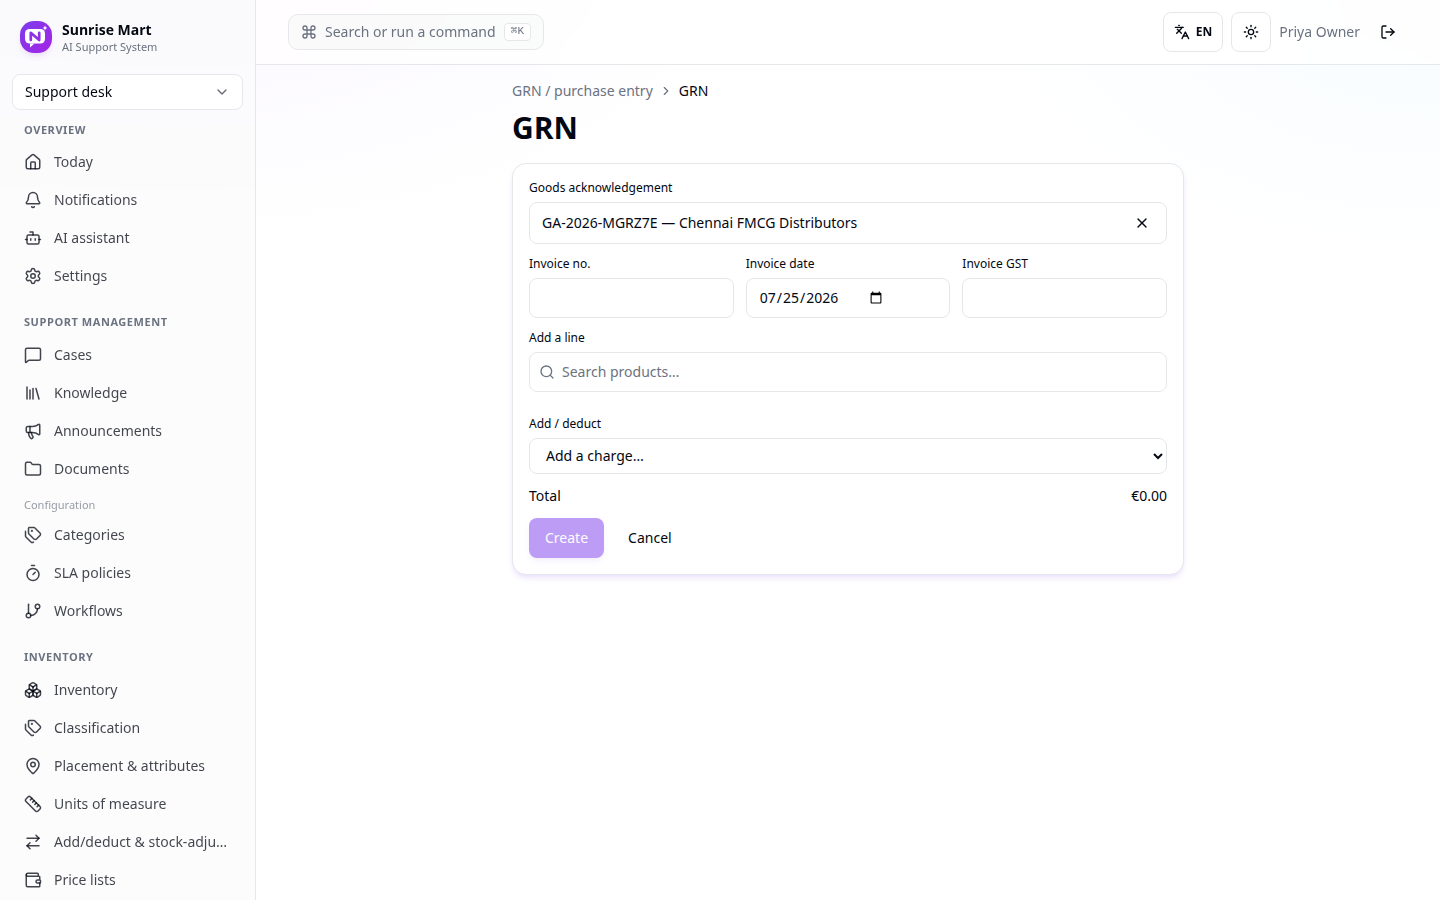
Pick the Open goods acknowledgement, then enter each line's received quantity, basic cost, and GST% - these can genuinely differ from what the purchase order originally said, since this is what really arrived and what the invoice really says.
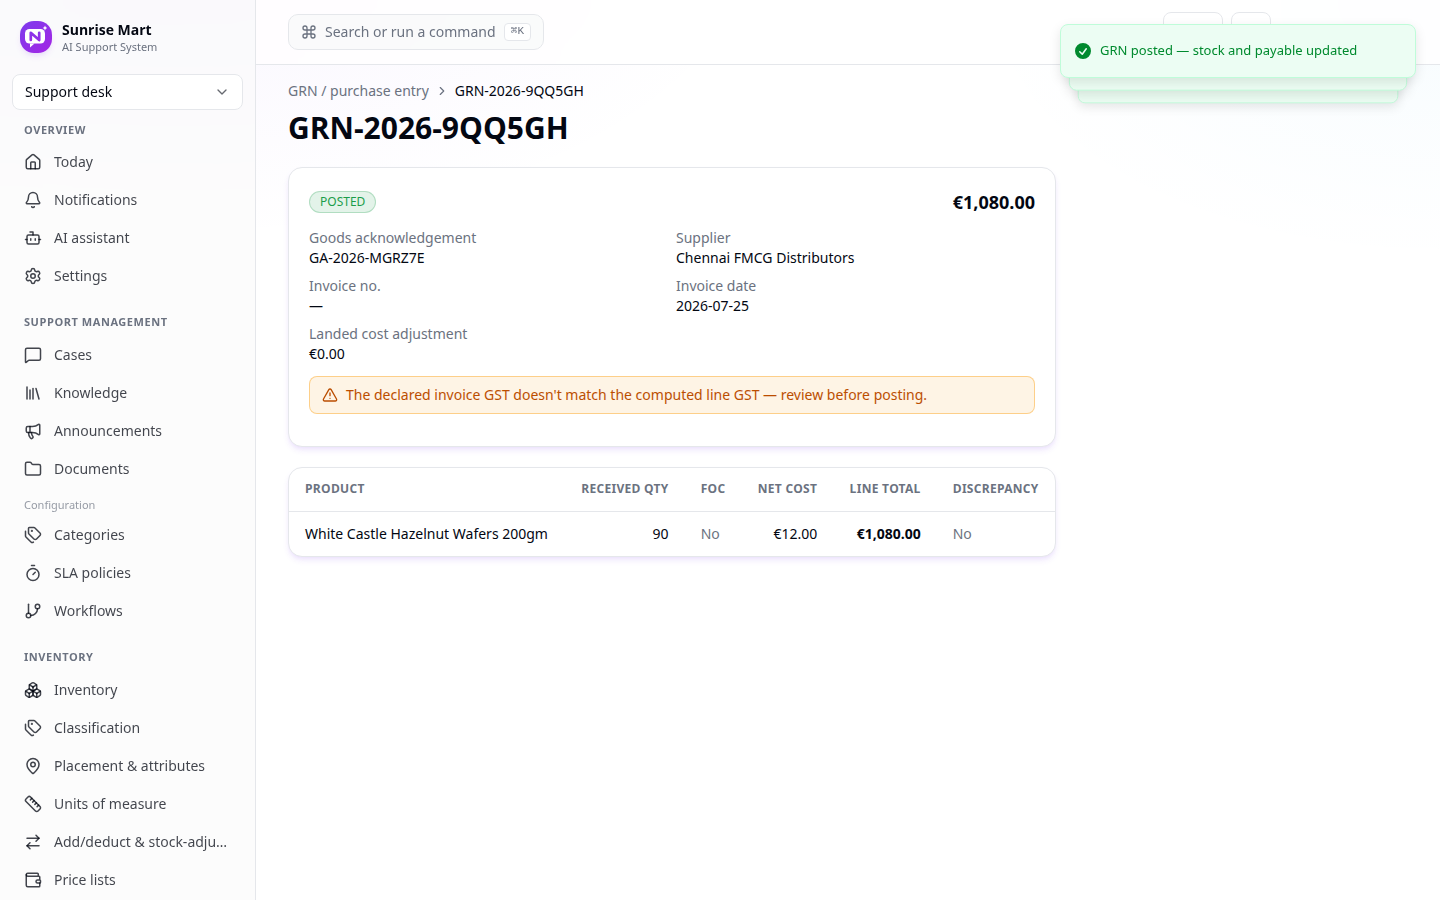
Post – The one moment stock and the payable actually change. Before this, everything is still just a document - freely editable, reversible, no real inventory impact.
If the invoice's own stated GST doesn't match what the line-by-line entries compute to, you'll see a warning banner like the one above - it's advisory, not a hard block. Review it, but you can still post if you're confident the numbers are right.
Once posted, the GRN is GRN-2026-XXXXXX - a permanent record. The supplier's own "Whom do I owe" balance now reflects this bill.
Who can do what
| Action | Agent | Admin / Owner |
|---|---|---|
| View tax & currency, terminals, reasons, pay modes | ✓ | ✓ |
| Change tax & currency, reasons, pay modes | ✗ | ✓ |
| Assign staff commerce roles | ✗ | ✓ |
| Set your own PIN (once you hold a commerce role) | ✓ | ✓ |
| Register a terminal | ✗ | ✓ |
| Update the go-live checklist | ✗ | ✓ |
| View the catalog, suppliers, purchase orders | ✓ | ✓ |
| Add stock, create a supplier | ✓ | ✓ |
| Create / edit a draft purchase order | ✓ | ✓ |
| Approve a purchase order | ✗ | ✓ |
| Create a goods acknowledgement | ✓ | ✓ |
| Create and post a GRN | ✓ | ✓ |
Related: Manual: Retail till & billing · Manual: Food production
Manual: Retail till & billing
A step-by-step training manual for cashiers and till staff - signing in, opening the day, building a bill, discounts, payment, and closing out.
Manual: Food production
A step-by-step training manual for kitchen and back-office staff - dishes, recipes, kitchen custody, production issue and settlement, and the daily ledger.